These chairs were designed by John Hauser Sr. for Ironworks, Kitchener, Ontario, in 1955. These chairs need some sprucing up, and I am the man for the job!
You might remember we picked up a couple of these chairs a few posts back. I thought it would be a good time to refinish them.

My first stop was to swing into Jo-Ann Fabrics to pick up some tasteful pink pleather fabric to recover the seats and back rests.
Once I got home with the fabric I started on the deconstruction of the chairs.
These chairs only had 8 screws total holding the seat and backrest to the frame. That took just a couple of minuets to remove.

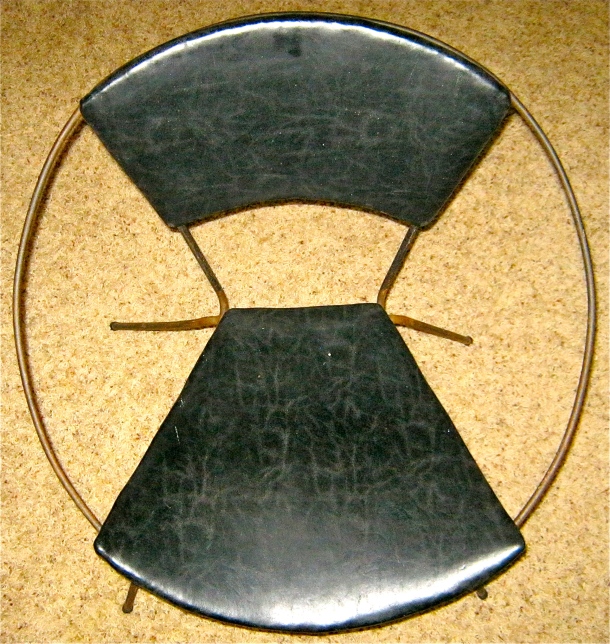
Here are the cushions removed. Some might say, “what is wrong with the current fabric”?? All I can say is that it isn’t pink.

I laid the cushion on the fabric and outlined it with about a 3 inch space from the edge of the cushion and cut it out.
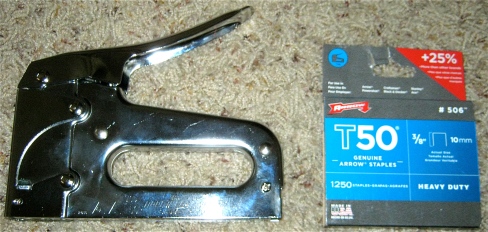
Here is the type of stapler and staples I used on these chairs. I picked them up at my local home improvement store.

The trick is to start on one edge and staple the fabric down. Then start on the opposing edge pulling fabric tight and staple it into place. This is how it should look. Make sure to cut off any excess fabric.

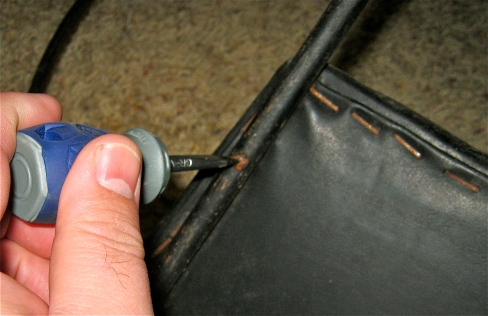
The backrests were upholstered on the front and back. I first had to remove the staples and material from the back of the backrest. The next step was to recover the front of the backrest. Recovering the front of the backrest uses the same process as the seat portion of the chair above.

After the front of the backrest was recovered, I started on the back. I decided to make it look nicer than just staples as it had originally. I cut a piece of fabric roughly the same size with about 1-2 inch excess to fold under. I used black upholstery nails to finish the back. The trick is to keep constant pulling on the fabric as it is nailed. This pleather is stretchy so that helps pull out wrinkles.
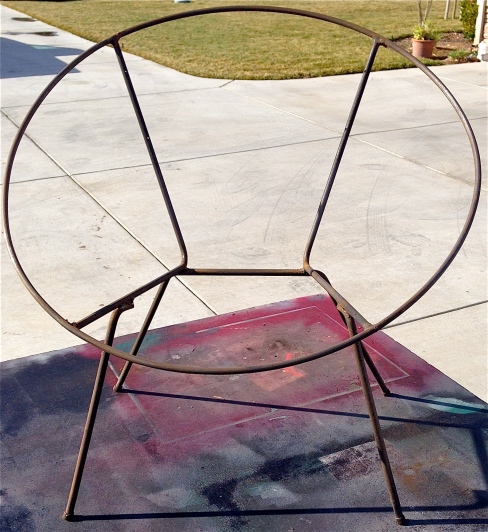
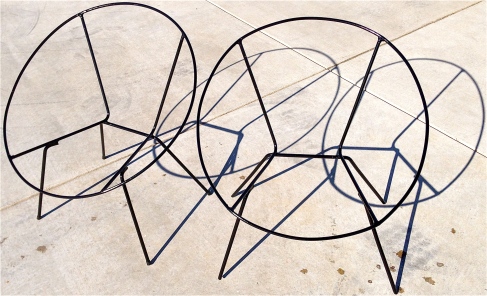
Now that the upholstery is done it is time to focus on the frames of the chairs and getting them painted. As you can see there is a lot of surface rust on these.

A great way to sand pieces like these is to use a foam sanding block. They come in various grit and conform to the area you are sanding.

I used Rust-Oleum black appliance paint. This stuff has a nice finish and is durable.
After a good coat of paint I let them cook in the sun.

I was able to pick up some new black rubber feet for the chairs so I replaced the old ones.
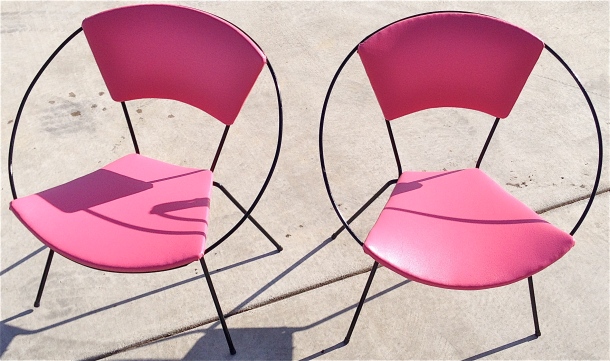
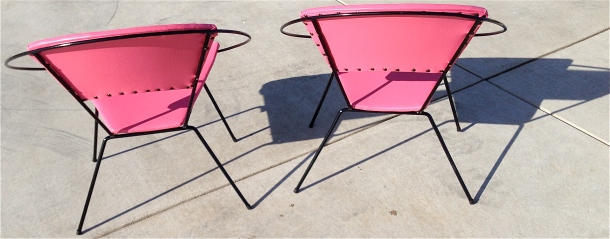
Here is how they turned out. We are very happy with them, and it will just add to the mid-century feel of our backyard alongside our mid-century BBQ!
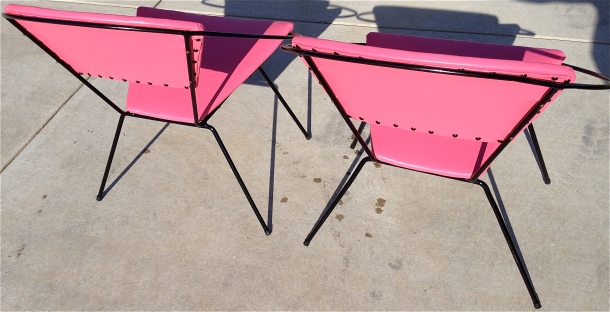
I think the upholstery nails look soo much nicer than just staples.


Wow! Those look great!! I feel like I could do it, too, after viewing your wonderful tutorial! Thanks for sharing. 🙂
LikeLike
Thanks Robin! This sort of re-upholstering is such an easy process that I am sure you could do it without any problem.
LikeLike
Hey Shane, I’m surprised with all the rebab work you do that you don’t have a pneumatic stapler. I’m sure you have a compressor! I’ve been working a lot more with nail heads to finish off pieces similar to this and it’s saved me some change to not have to send it out to my upholstery pros. New skill and save money. Plus + plus! Did you have a problem with how the nail heads say under the framing?
LikeLike
I do have a pneumatic stapler but I was recovering the cushions in my bedroom and didn’t feel like dragging all the stuff out to use the pneumatic stapler. The pneumatic stapler is a great tool and really speeds up the process. The nail heads seem to clear the frame ok. Thanks for your comment!
LikeLike
Love the pink pleather! Great job; thanks for sharing 🙂
LikeLike
Thanks!
LikeLike
Another GREAT Hepcat restoration! Bravo! Can’t help but love a guy that LOVES pink!
LikeLike
Thanks for all the support Vic :)!
LikeLike
Wow, I must be in the minority when I say I liked the original material better on the Hoop chair. They did come out fantastic with the pink, no doubt, but I had to check myself right now when while cruising google images for Hoop chairs, the one Hoop chair that popped right out to me was that dark green one riiiiight there. Then to click on the image which took me to hepcatresto, I was kind of elated to see the Hoop chair picture had taken me to you guys. Because I love EVERYTHING you two do. And have commented so more than a few times. And then I realized the dark green was the first picture and then realized “What?!? That kick ass dark green is going to be restored?”
I guess I can’t love everything you two do.
Actually I do because that pink rocked. I just liked the green better. It is after all my favorite color, especially that shade of green 🙂 On a Hoop chair too! Those chairs are awesome.
K, back to cruising Hoops on google.
Adios for now!
Greg
LikeLike
Hah, LOL, I just realized something while looking at your resto one more time.
The chair was not dark green, its black! It just looks dark green on my monitor.
Silly me ….
You know, the way your picture was taken, it really enhanced, on my monitor, the grain of the old material … and made it look dark green to me. And that really jumped out to me and appealed to me. Anyway, enough of my legit excuse 🙂
I’m just going to say I like the Hoop chair both ways.
K, nuff said.
Adios one more time 🙂
Greg
LikeLiked by 1 person
Oh Greg! You have us a good laugh tonight!!!
LikeLike