Mel and I were out visiting our friends Donny and Romy. While we were visiting, Donny presented a set of vintage concrete flamingos he was looking to get rid of. I have always been a fan of these kitschy lawn ornaments.
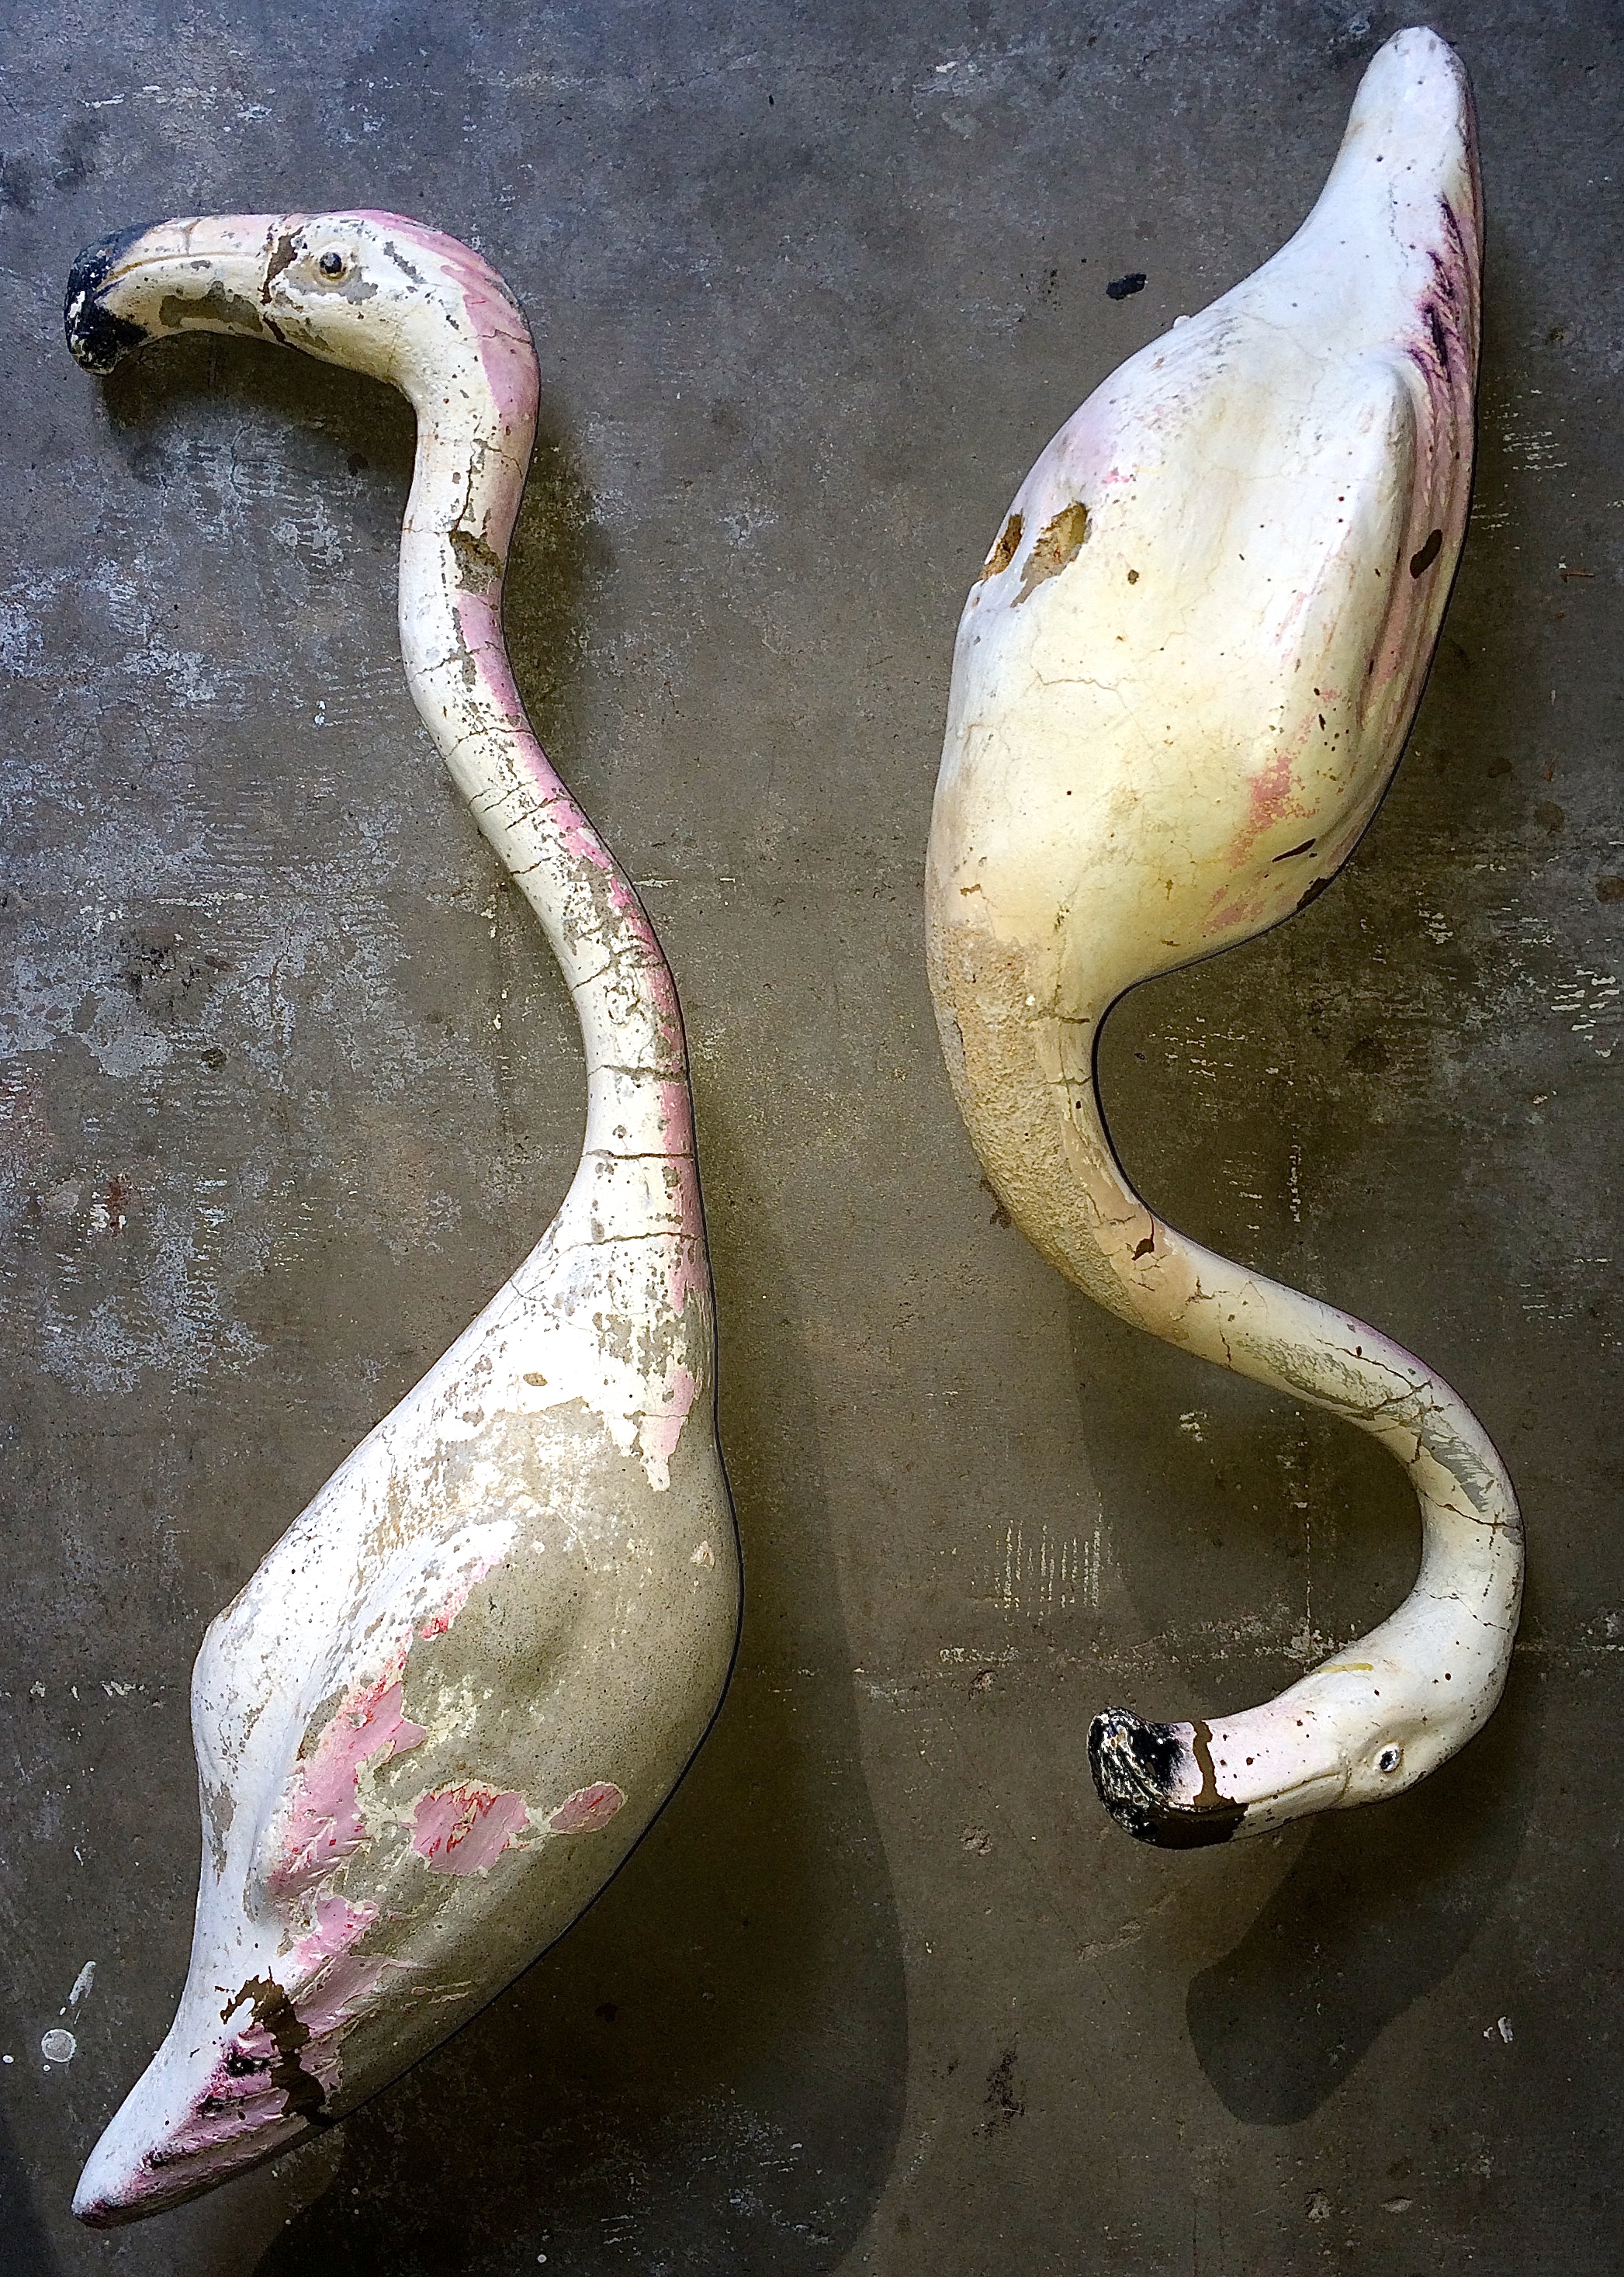
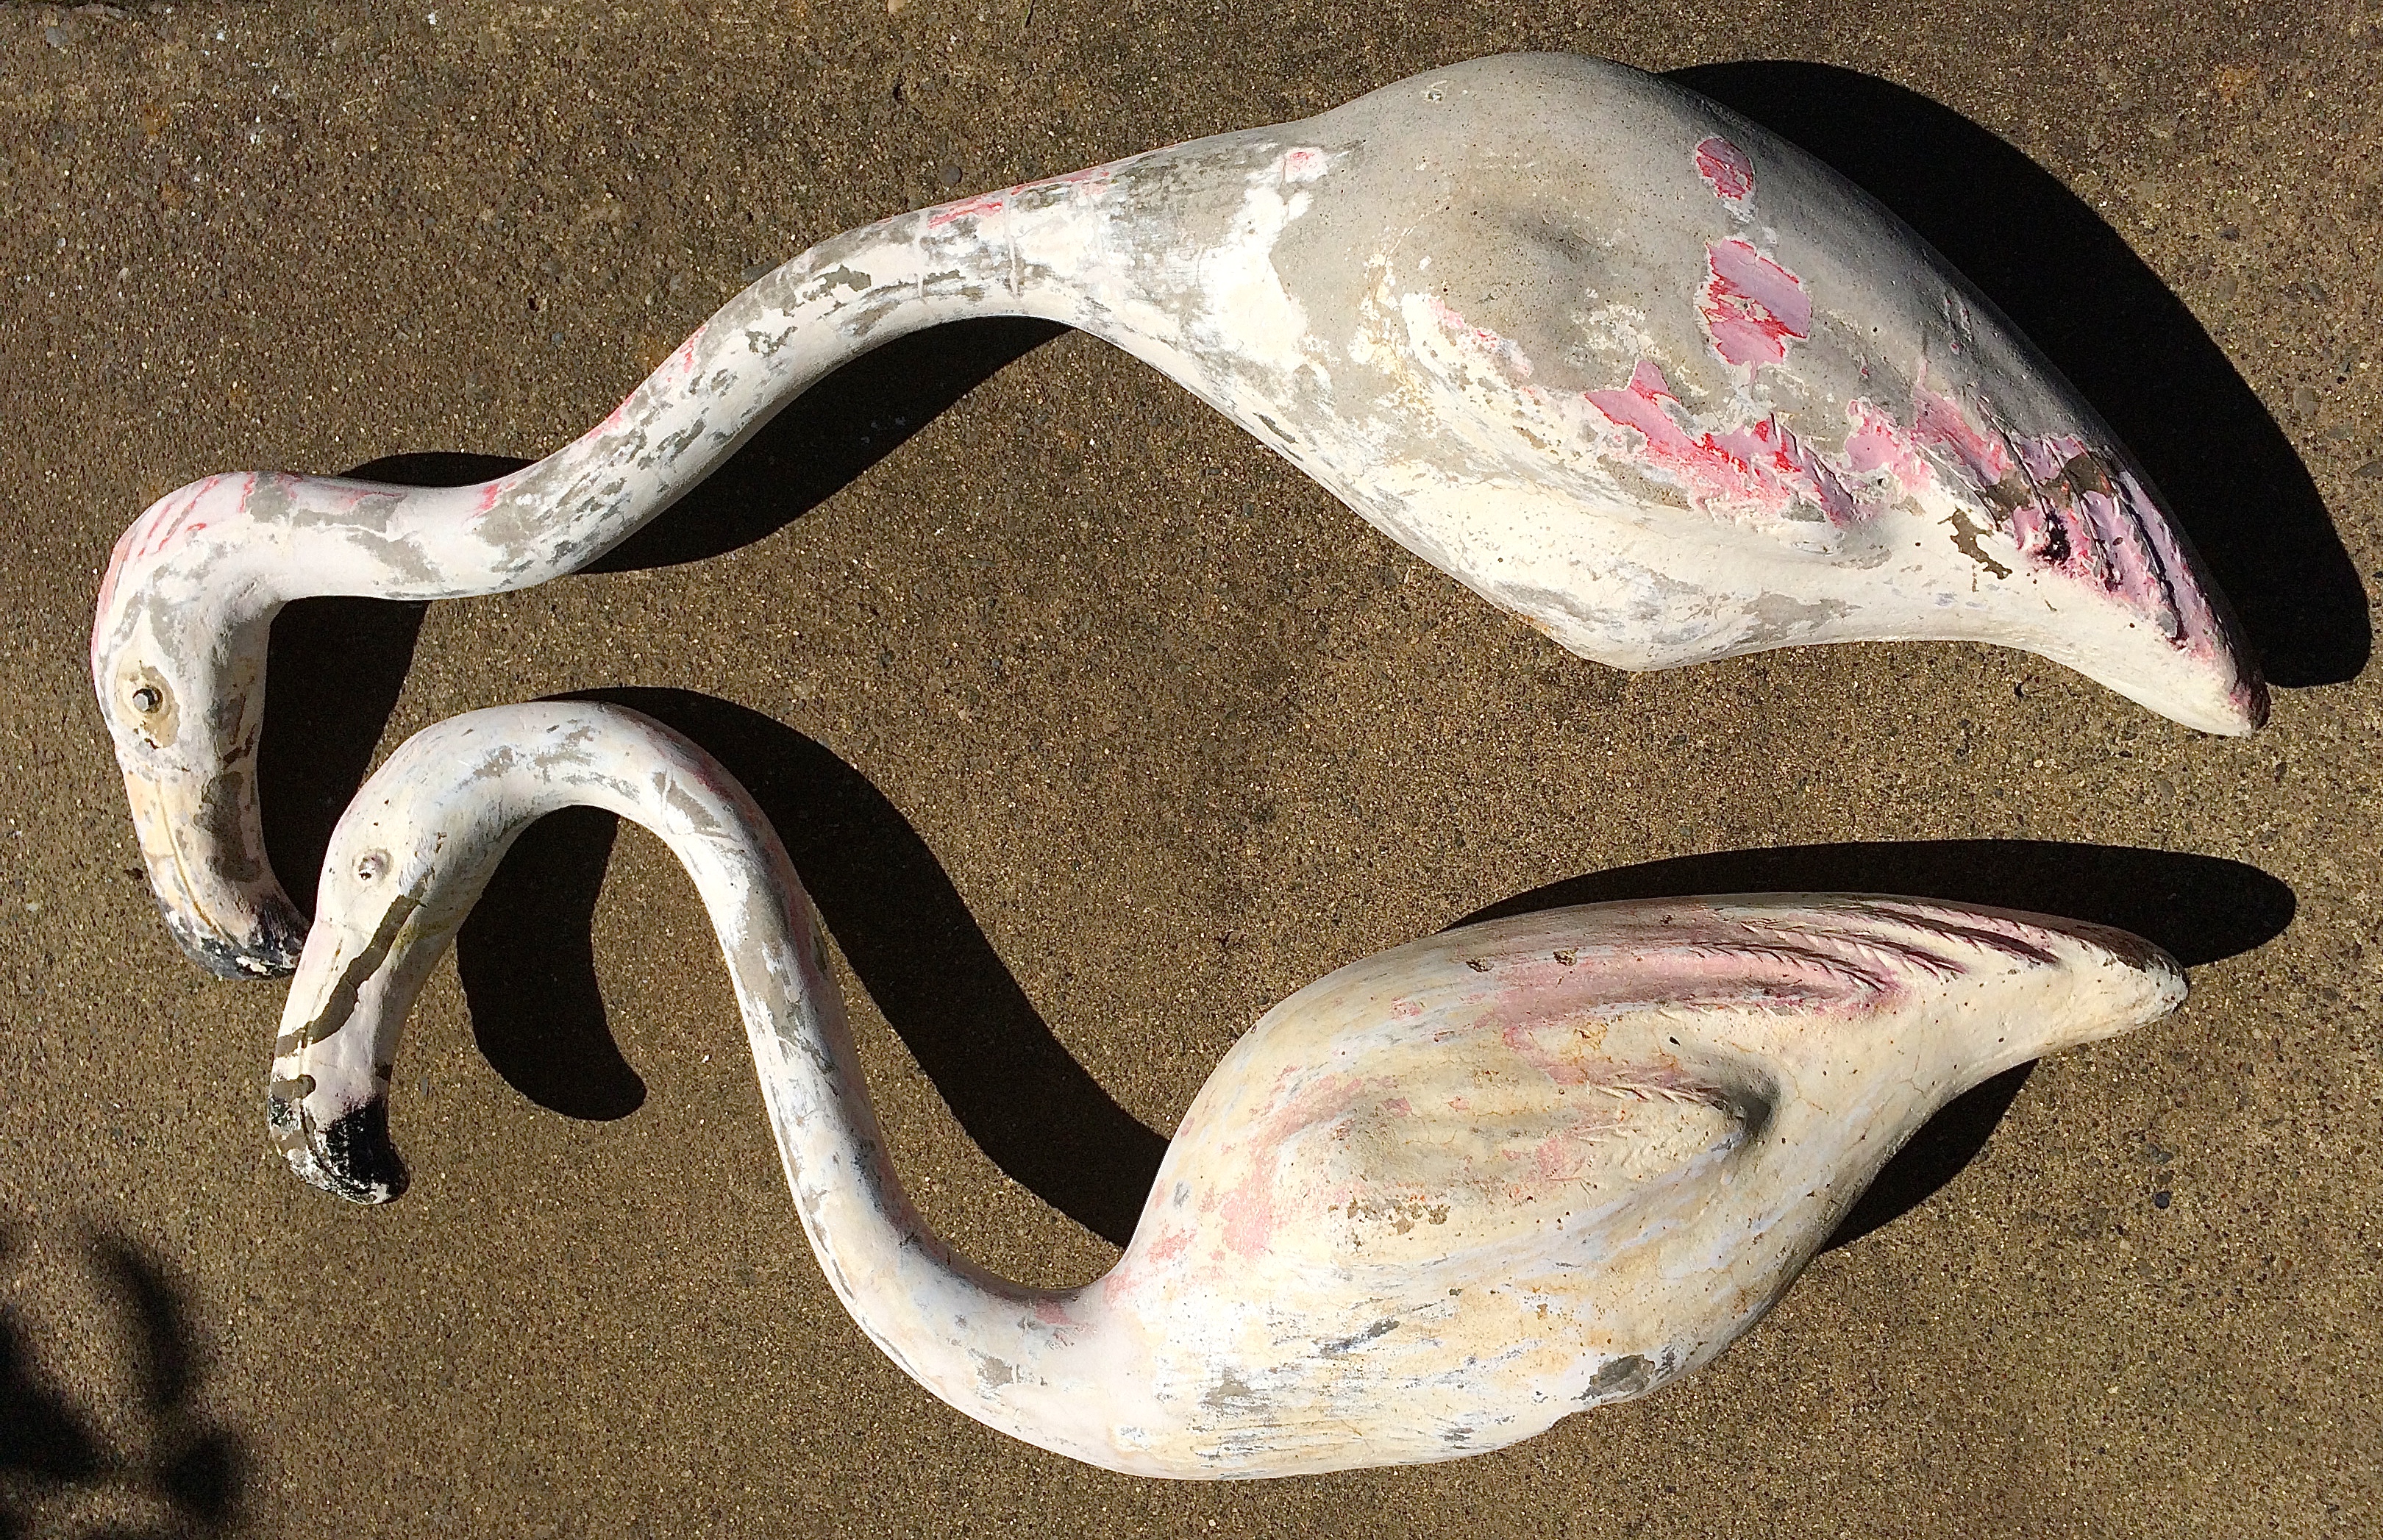
As you can see, they are well used.
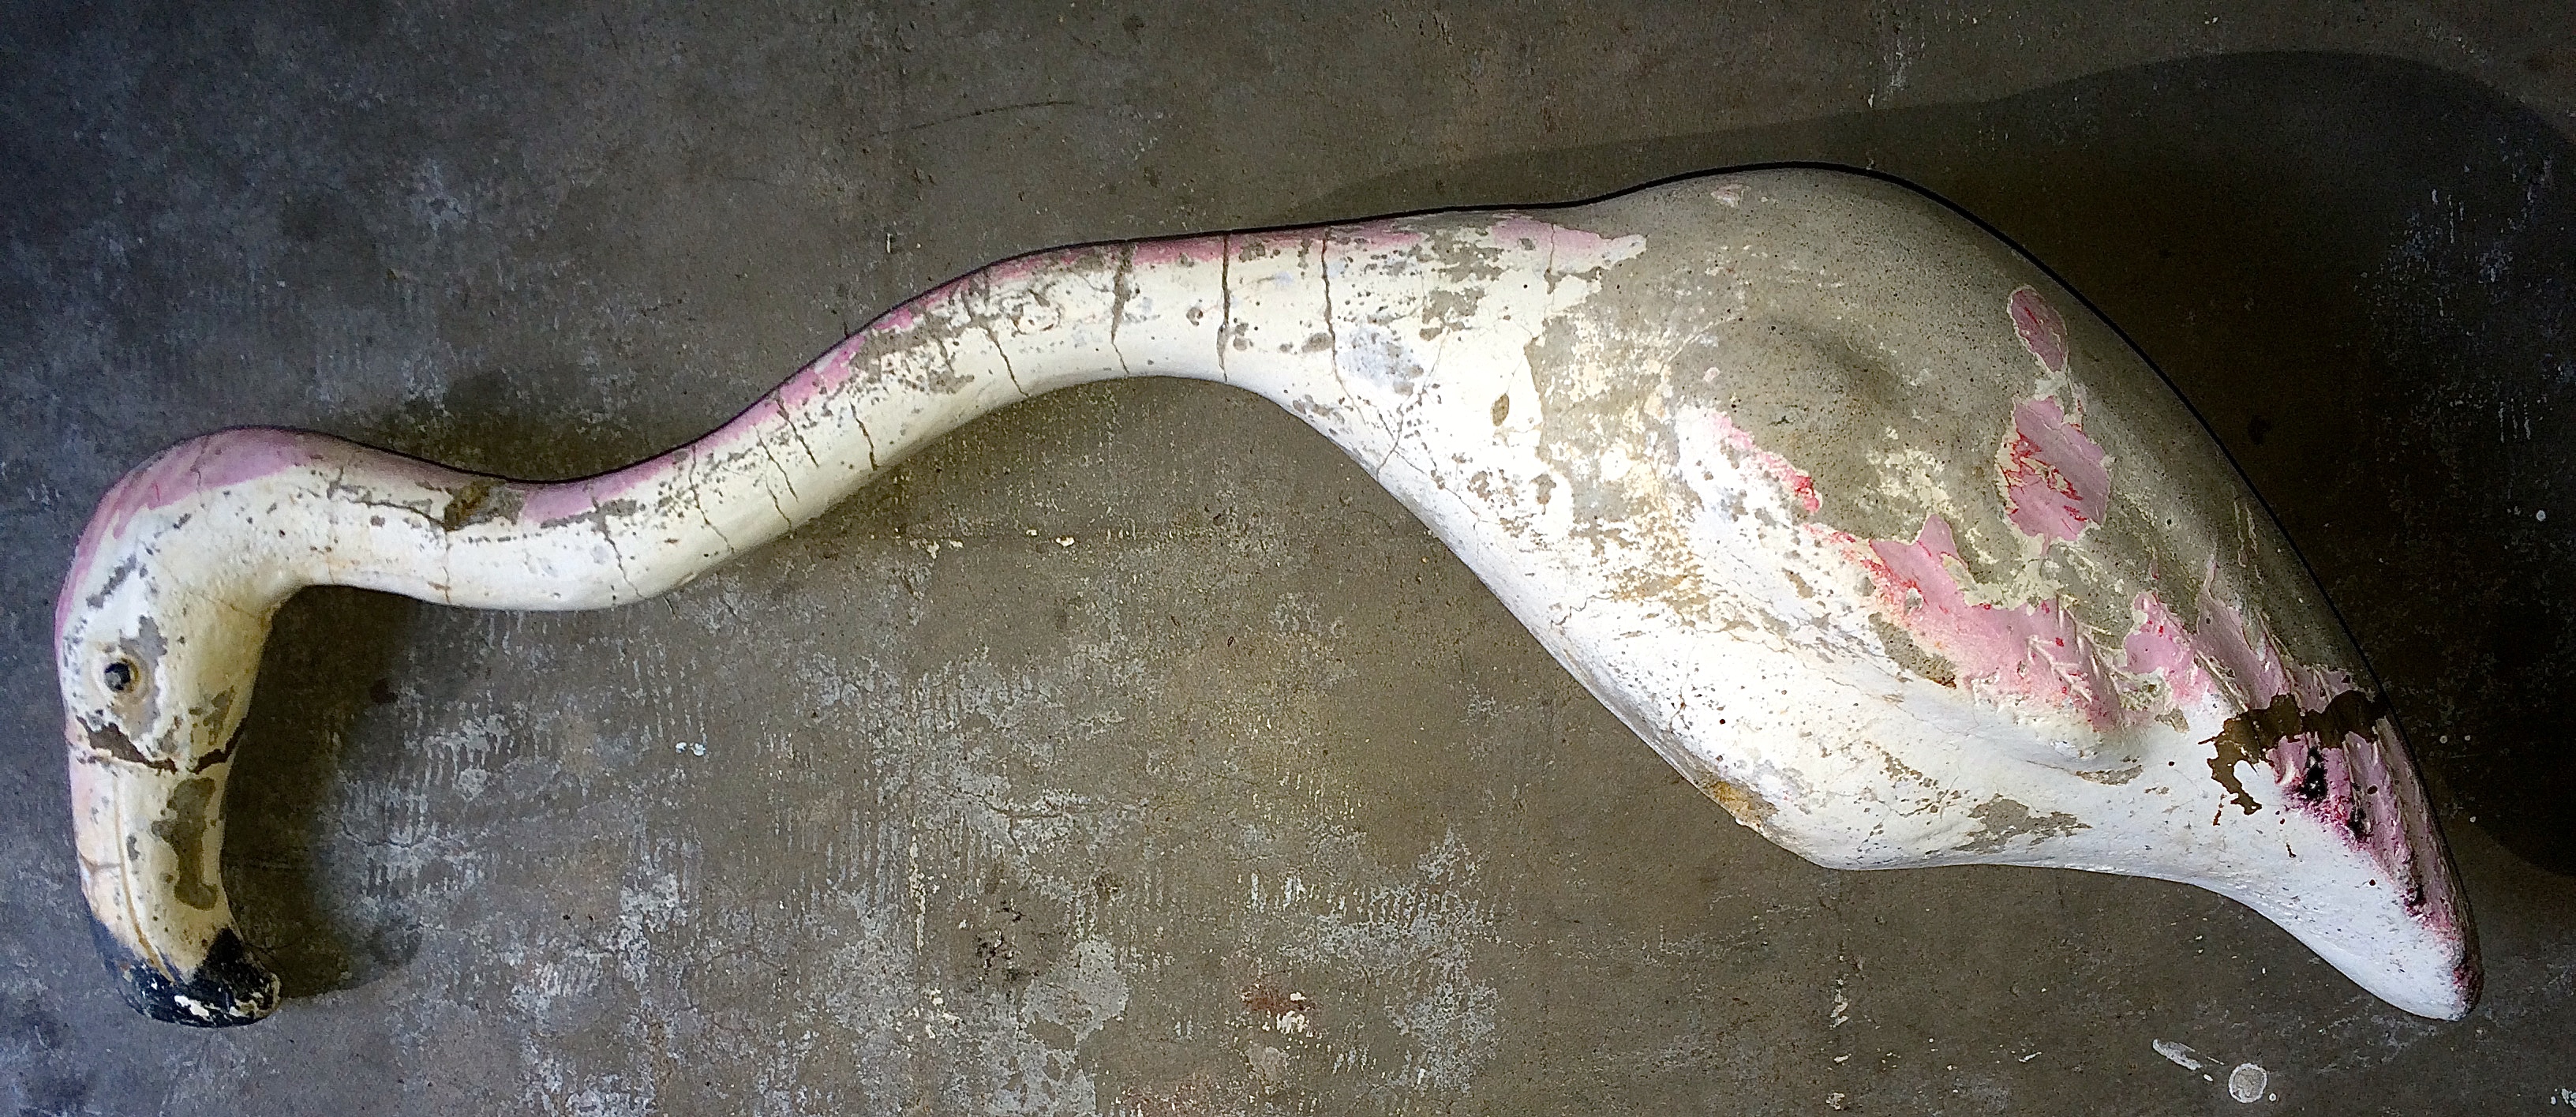
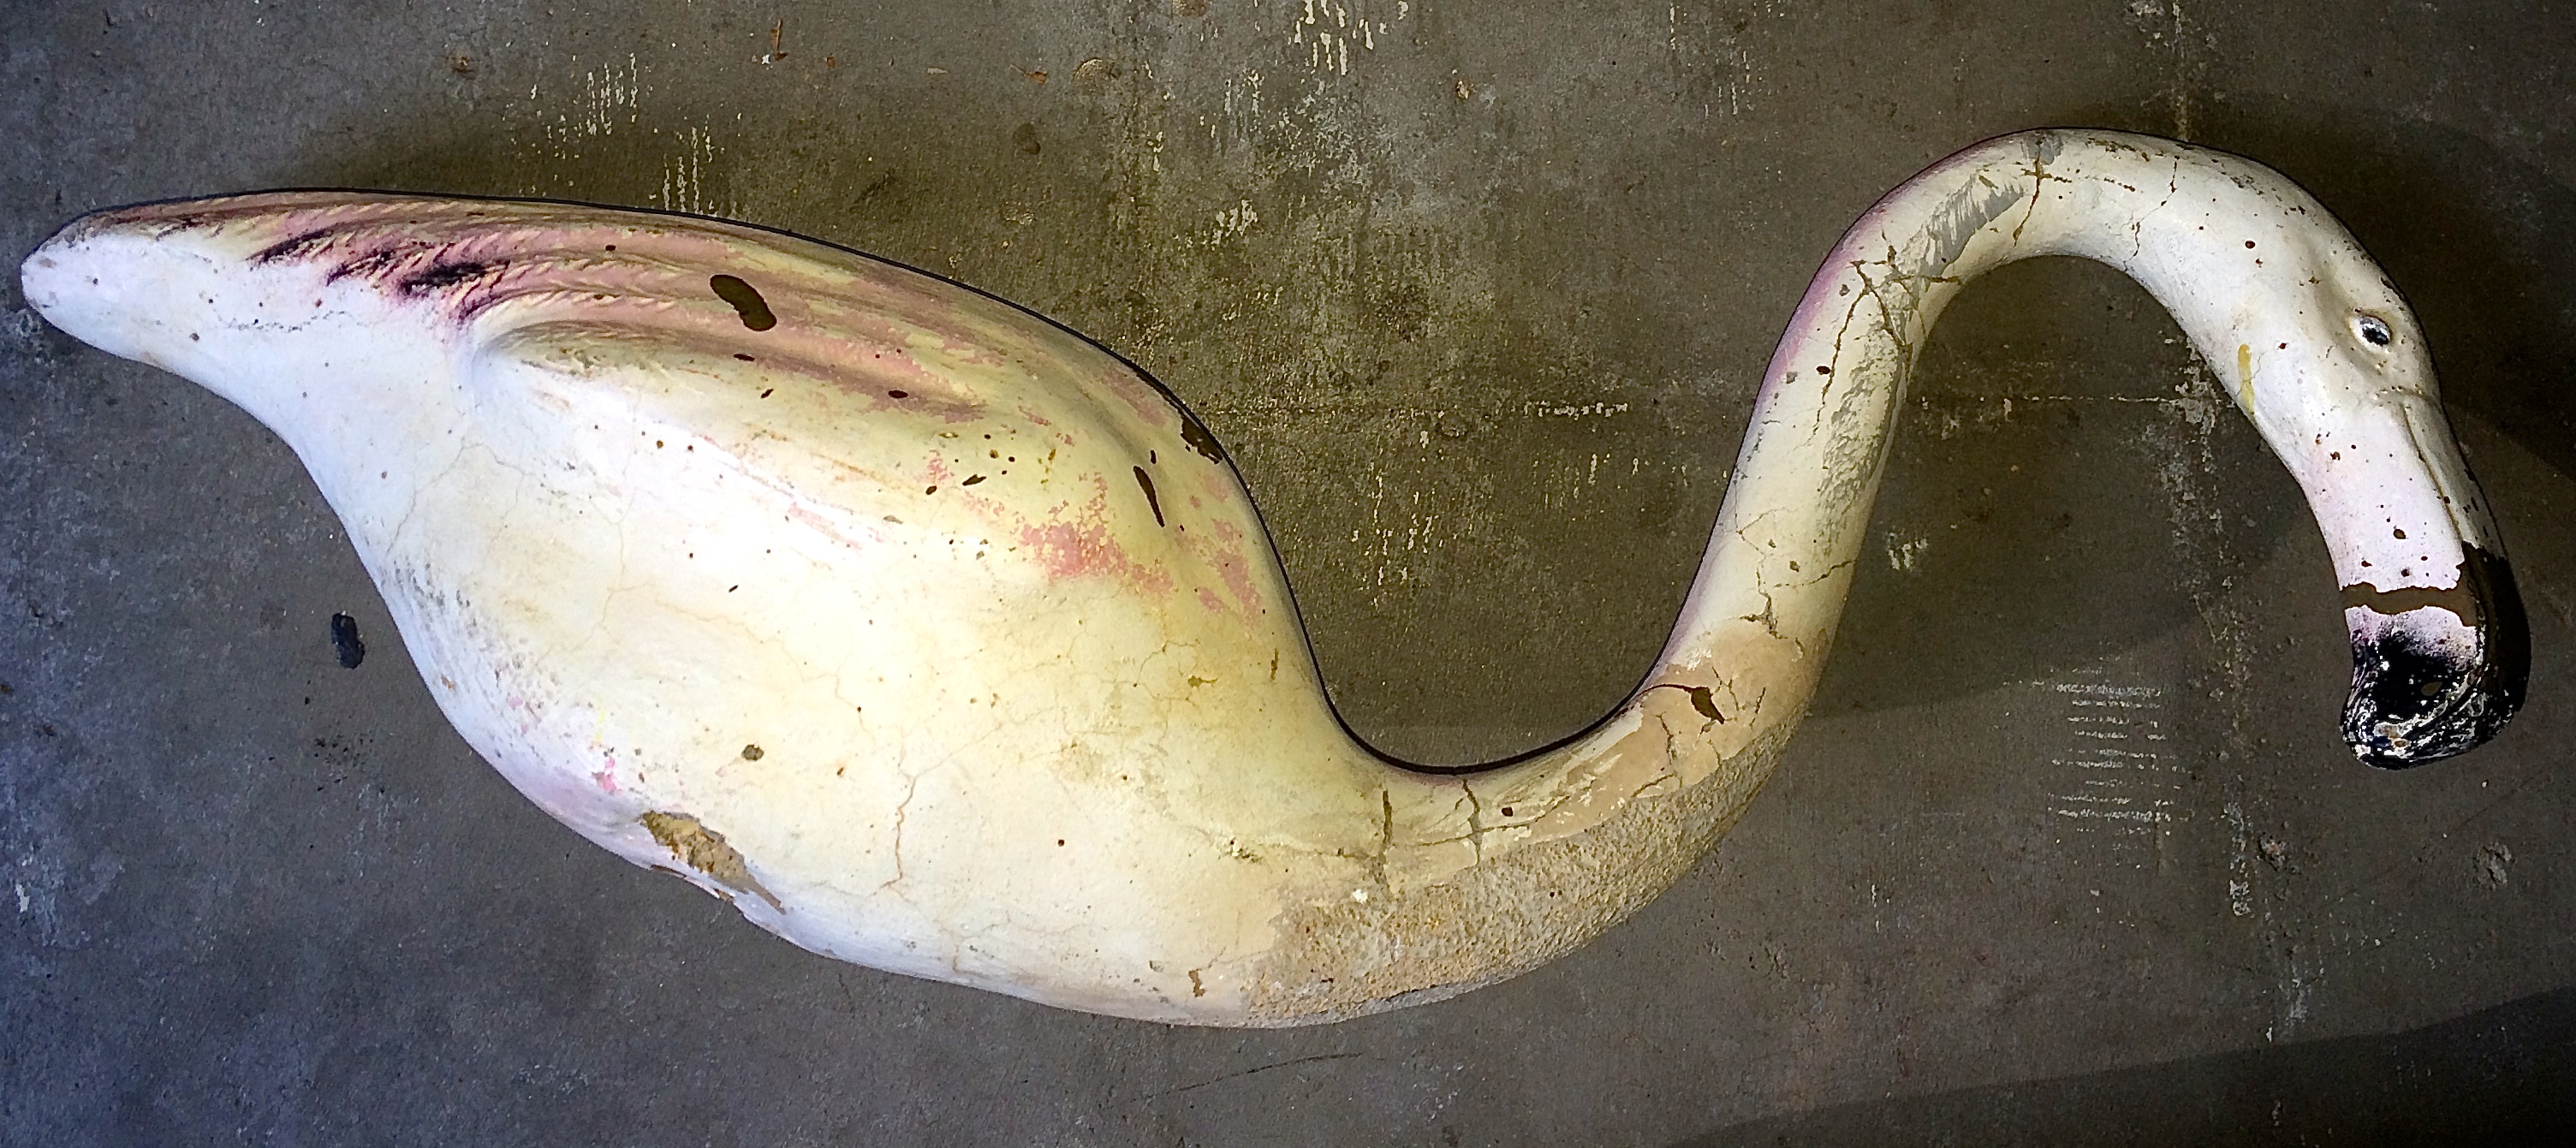
The necks of both Flamingos had numerous cracks and even chunks of concrete missing.
The paint is beyond faded and just not very impressive.
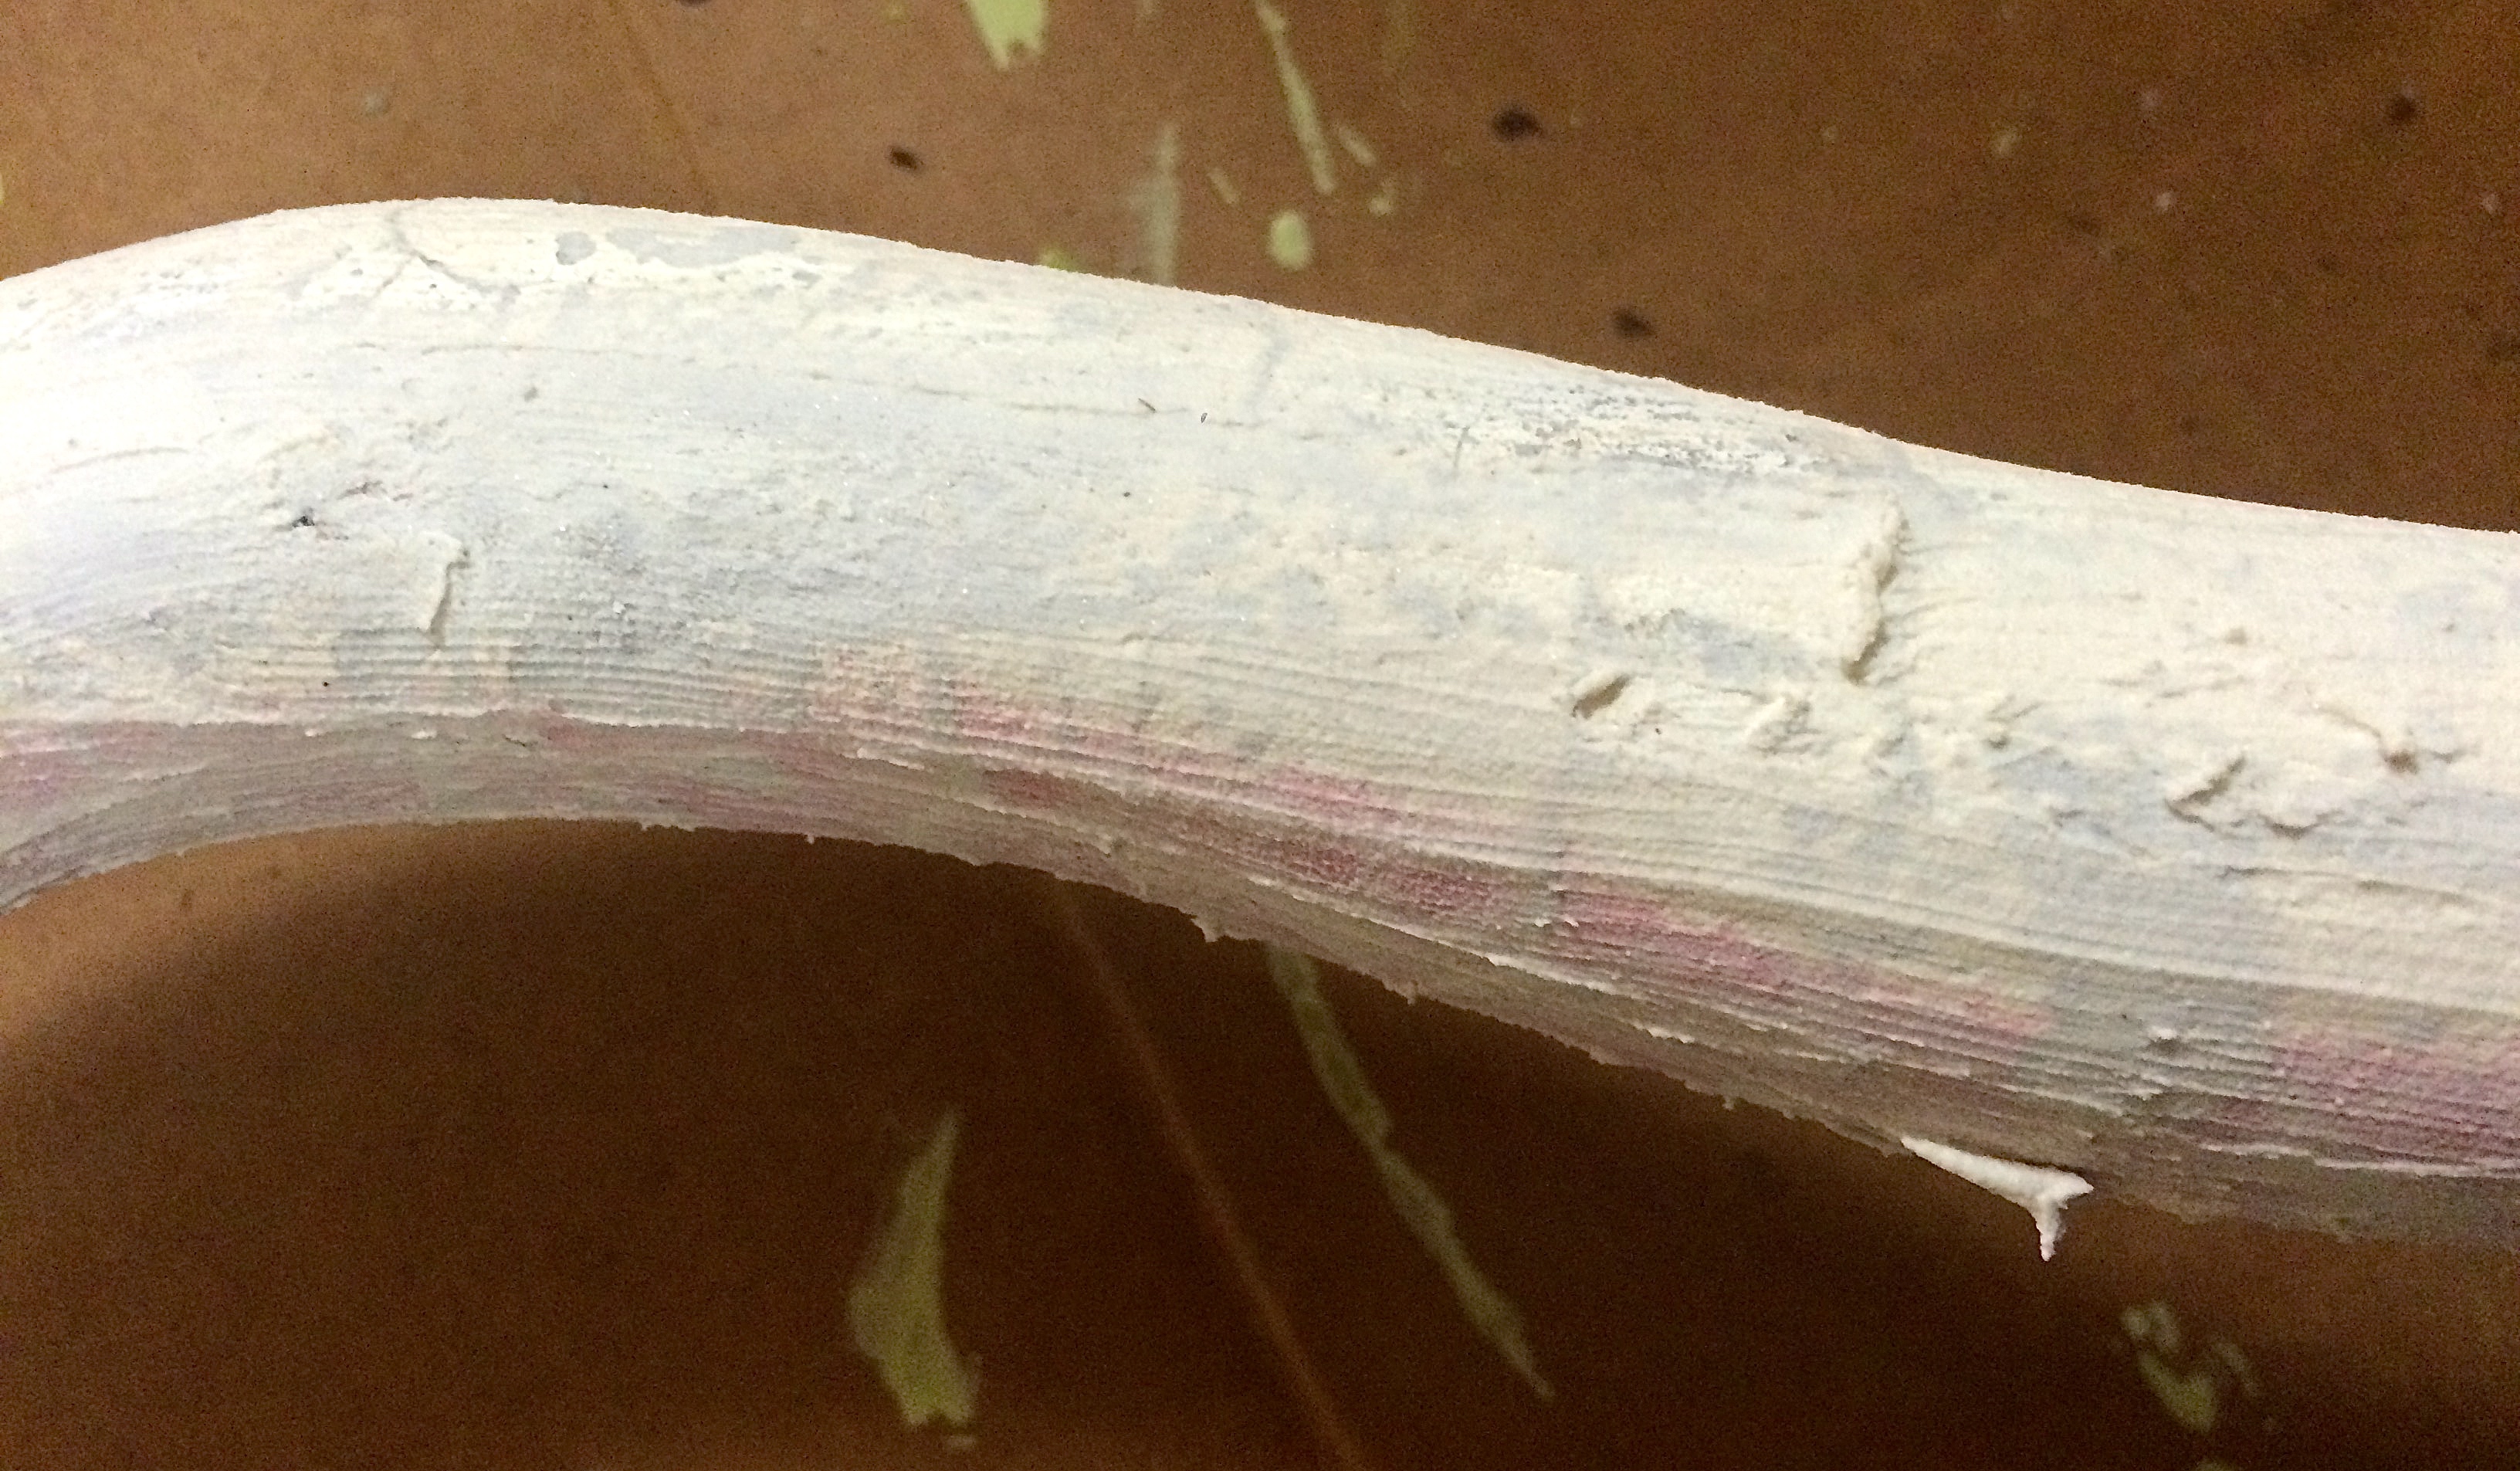
I knew the first thing I had to do was address the neck cracks and missing pieces of concrete from the neck. I used high performance DAP wall spackling paste that is specifically for cracks.

I had to cover the whole neck with this spackling to repair all the issues.
After the sun cooked them I sanded them, and the necks of these fabulous flamingos are like new!
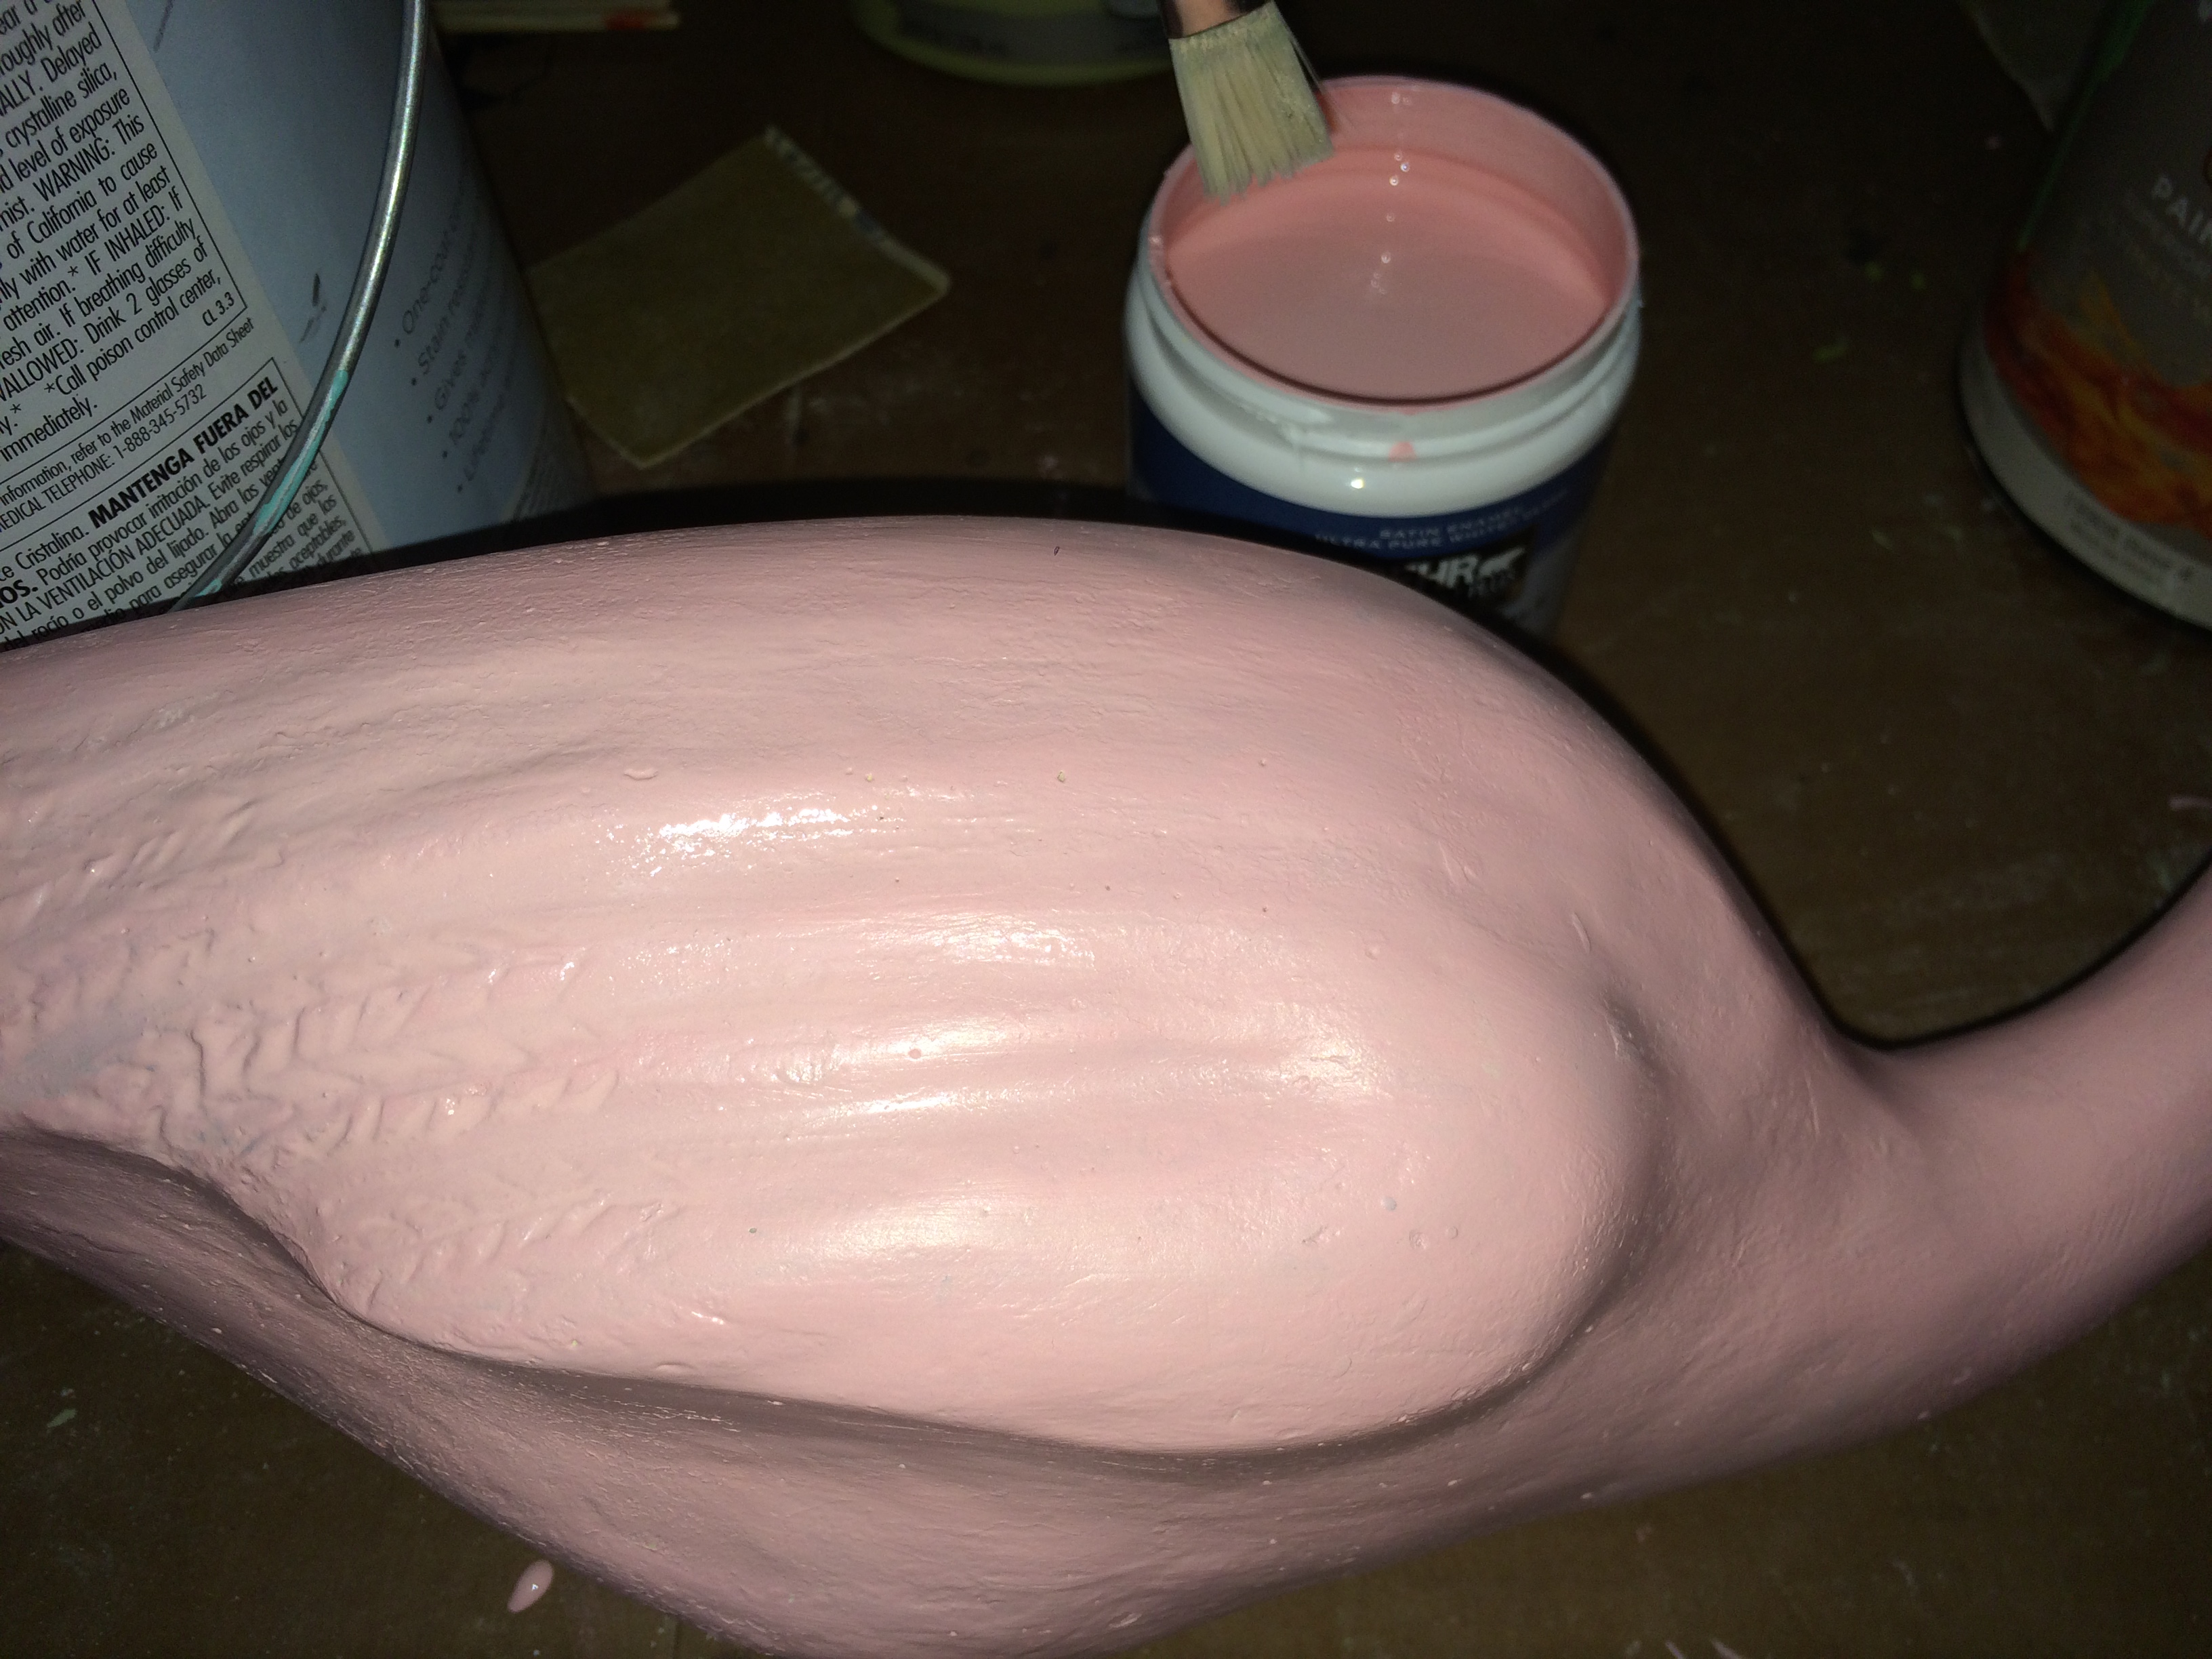
Now for the fun part, painting them.
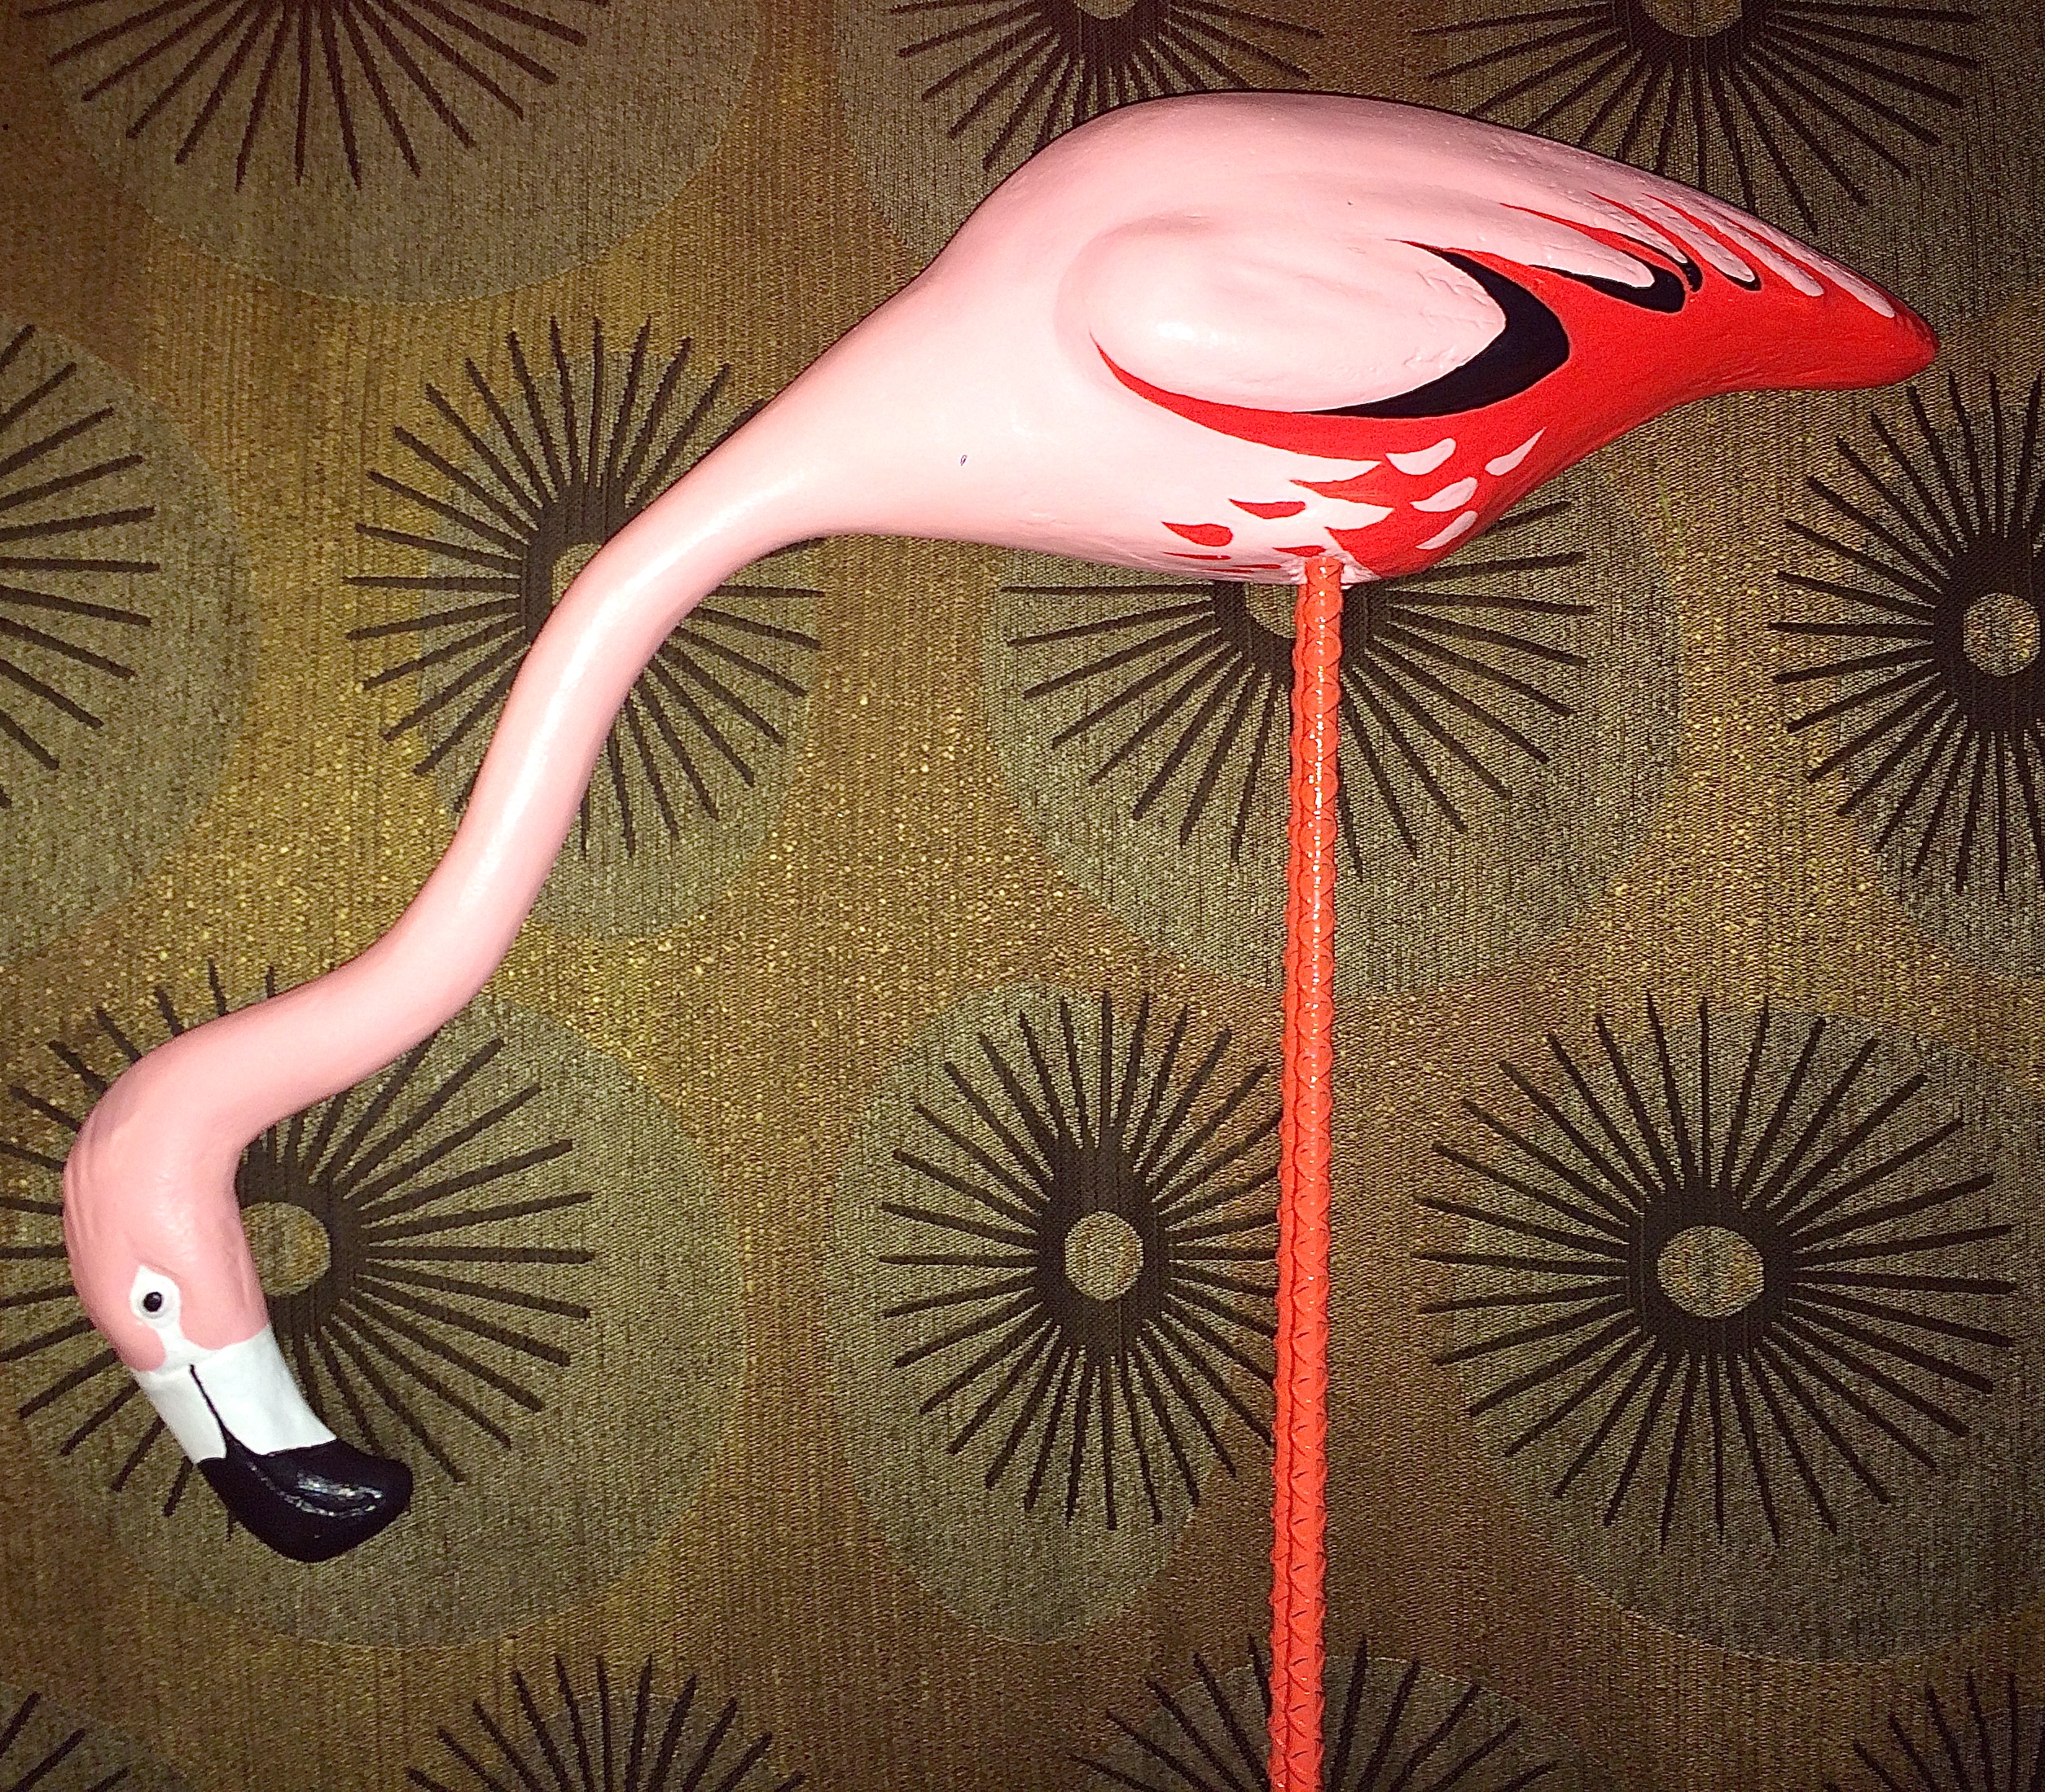
Now that the main body has been painted it is time for the detail work.
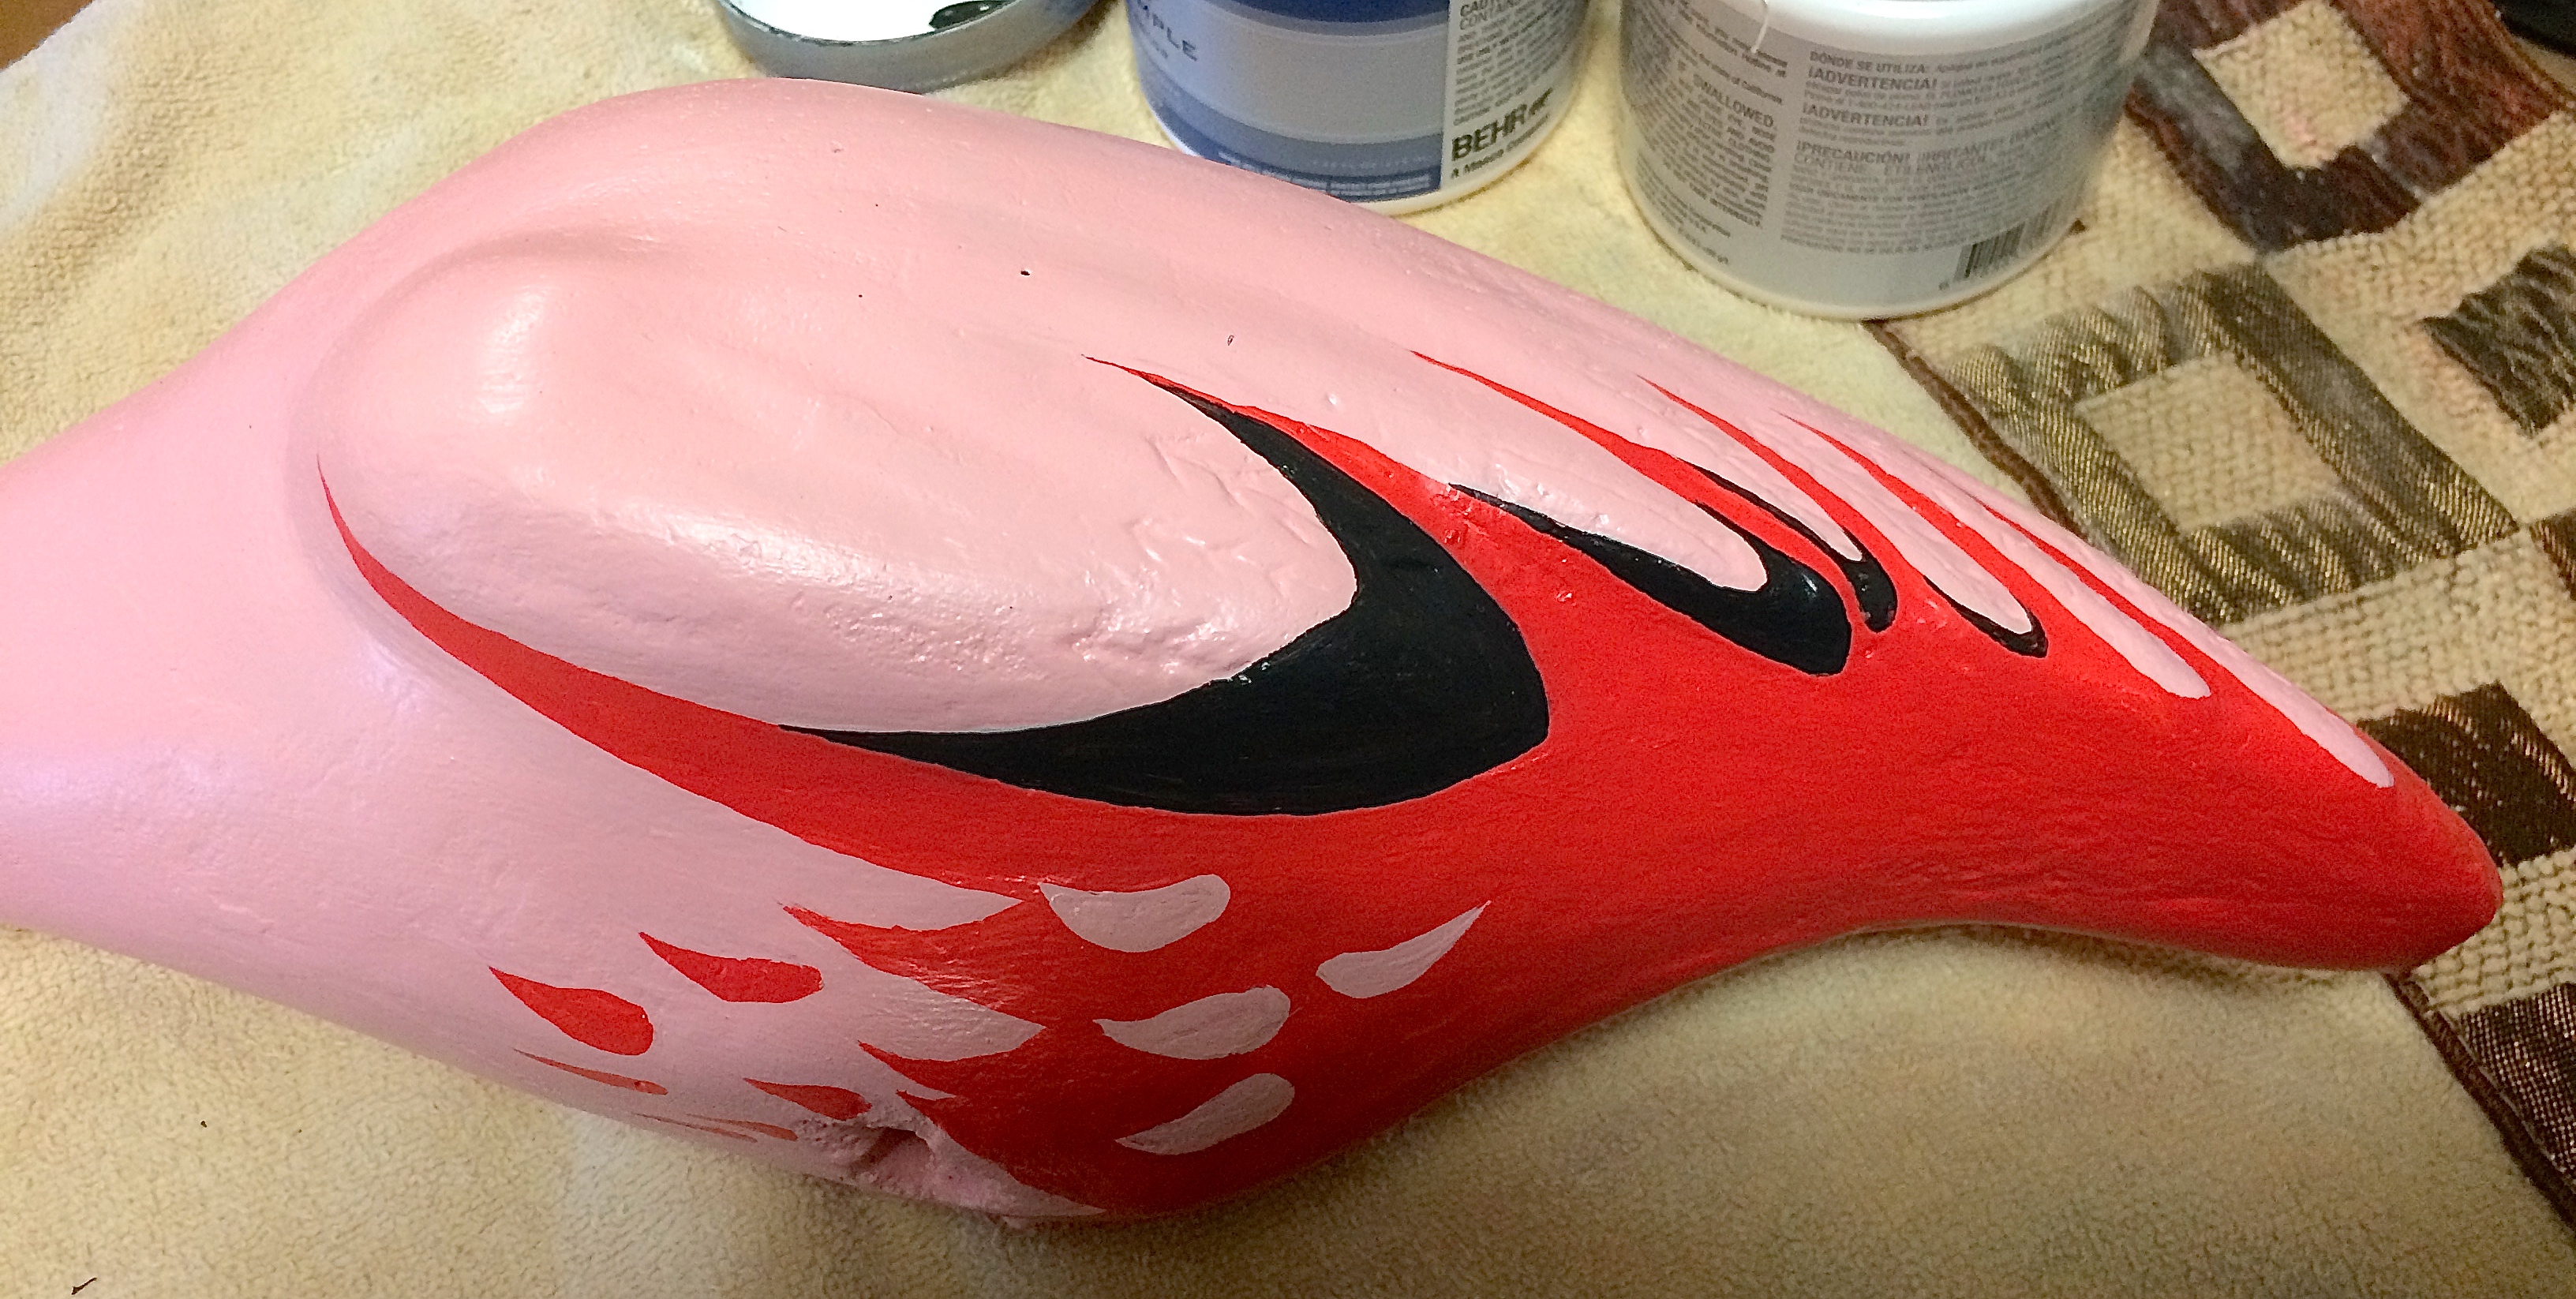
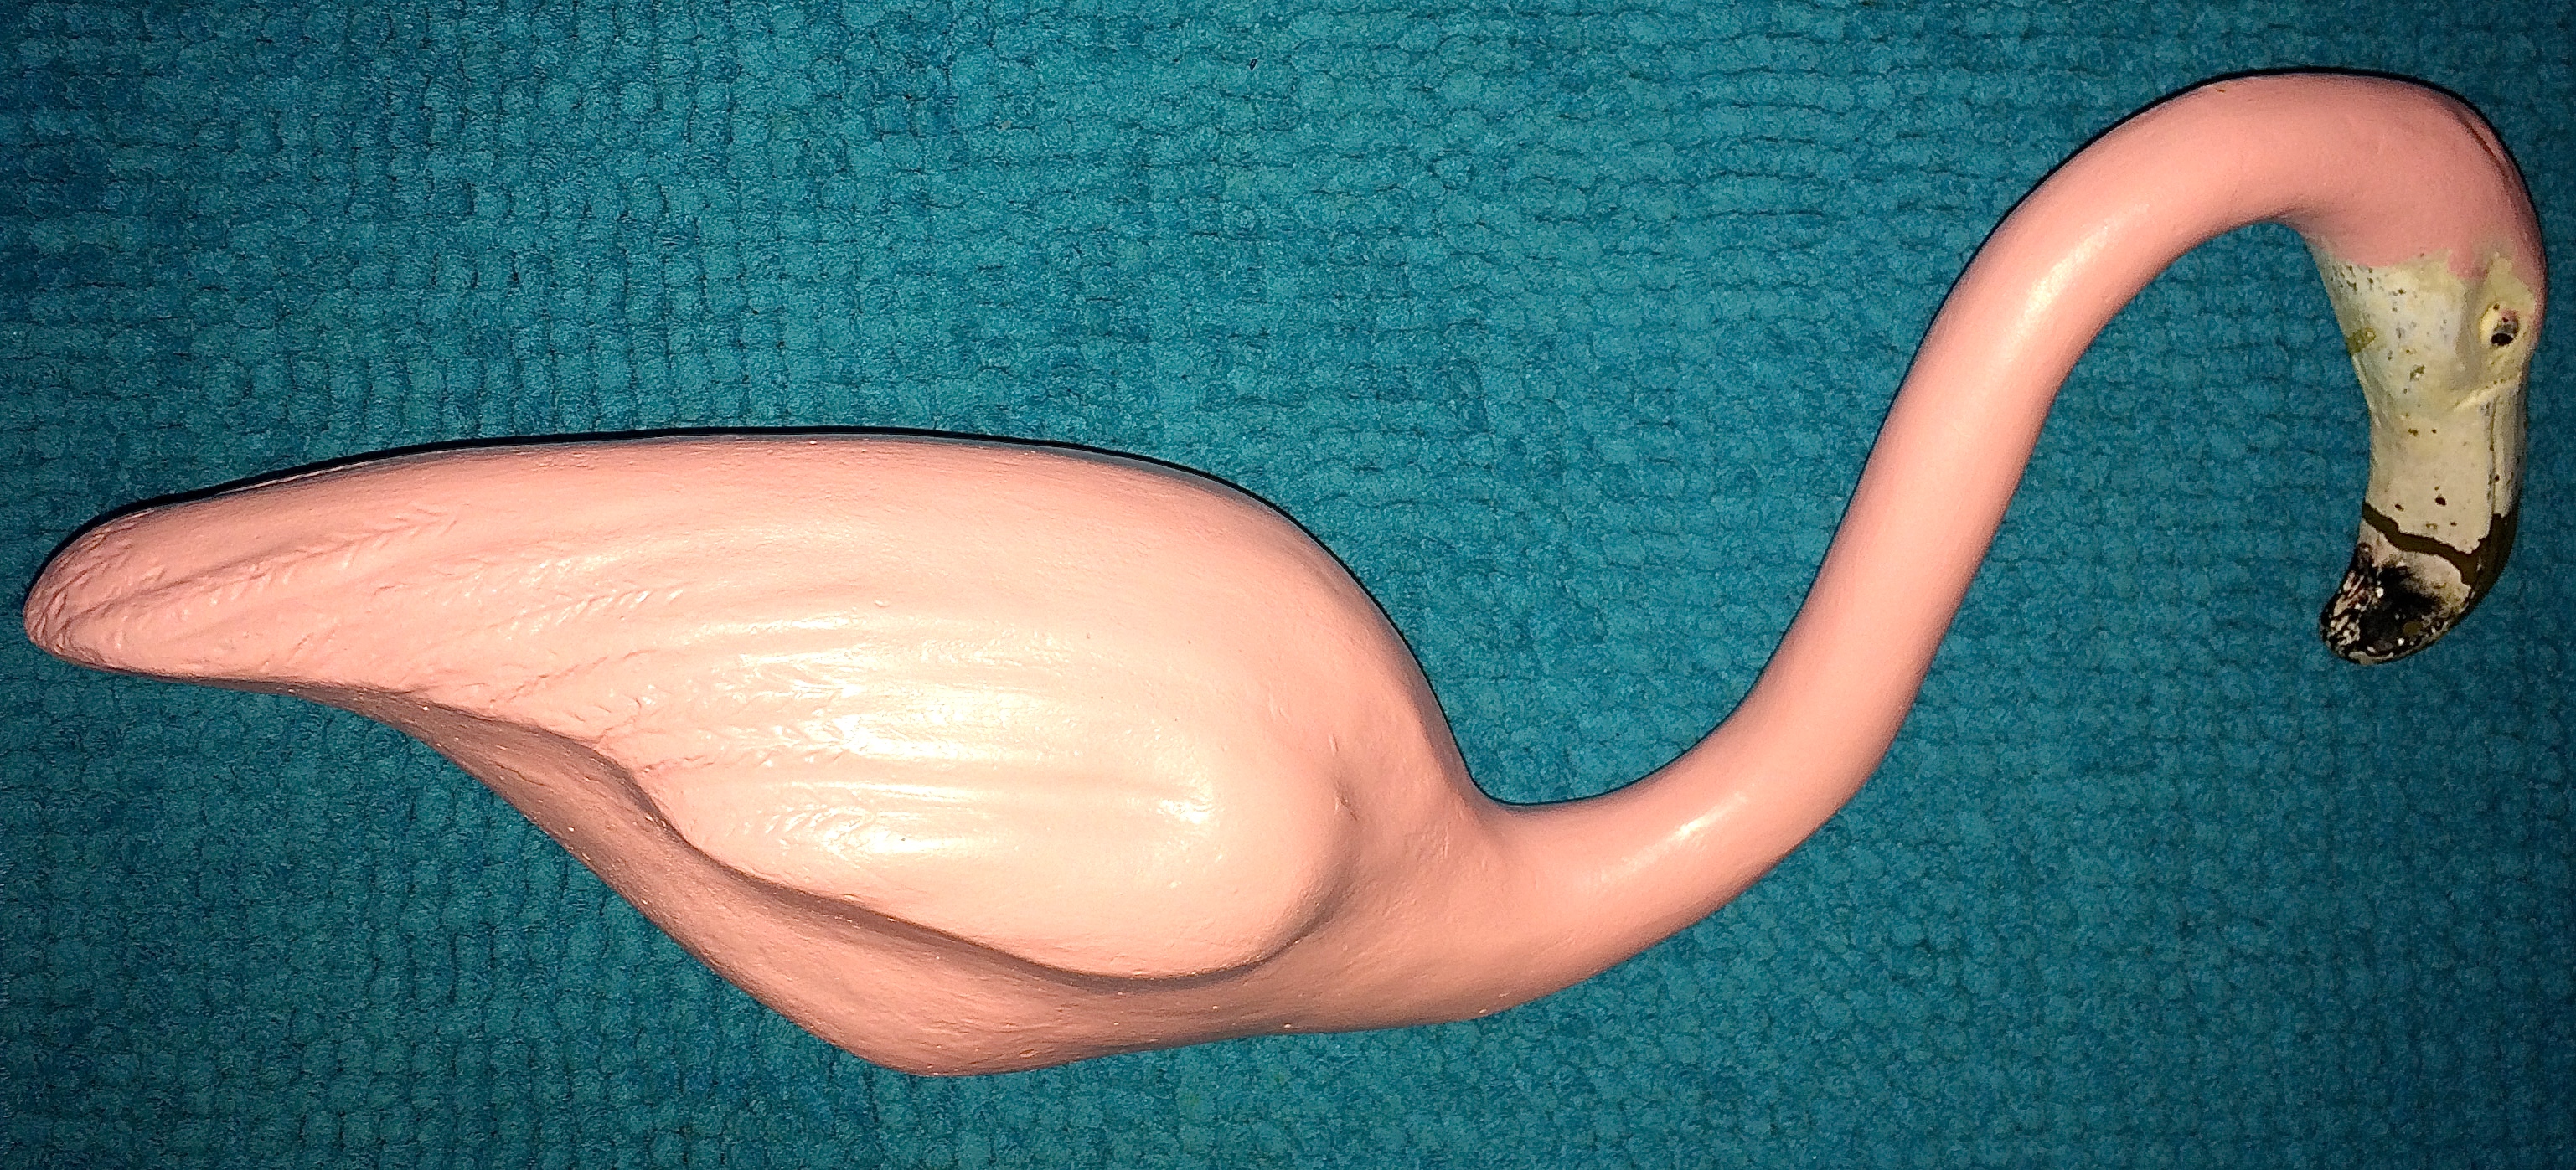
I looked at so many pictures of flamingos to get an idea of what I should do for the wing portion. Believe it or not, I was unable to find any referencesfor the original paint scheme. From what I was able to tell, it was pretty standard for folks to repaint them over the years as they faded. Because of this, I decided to use my own judgement and customize it. I knew with these flamingos, detail was not the order of the day, simplicity was the rule.
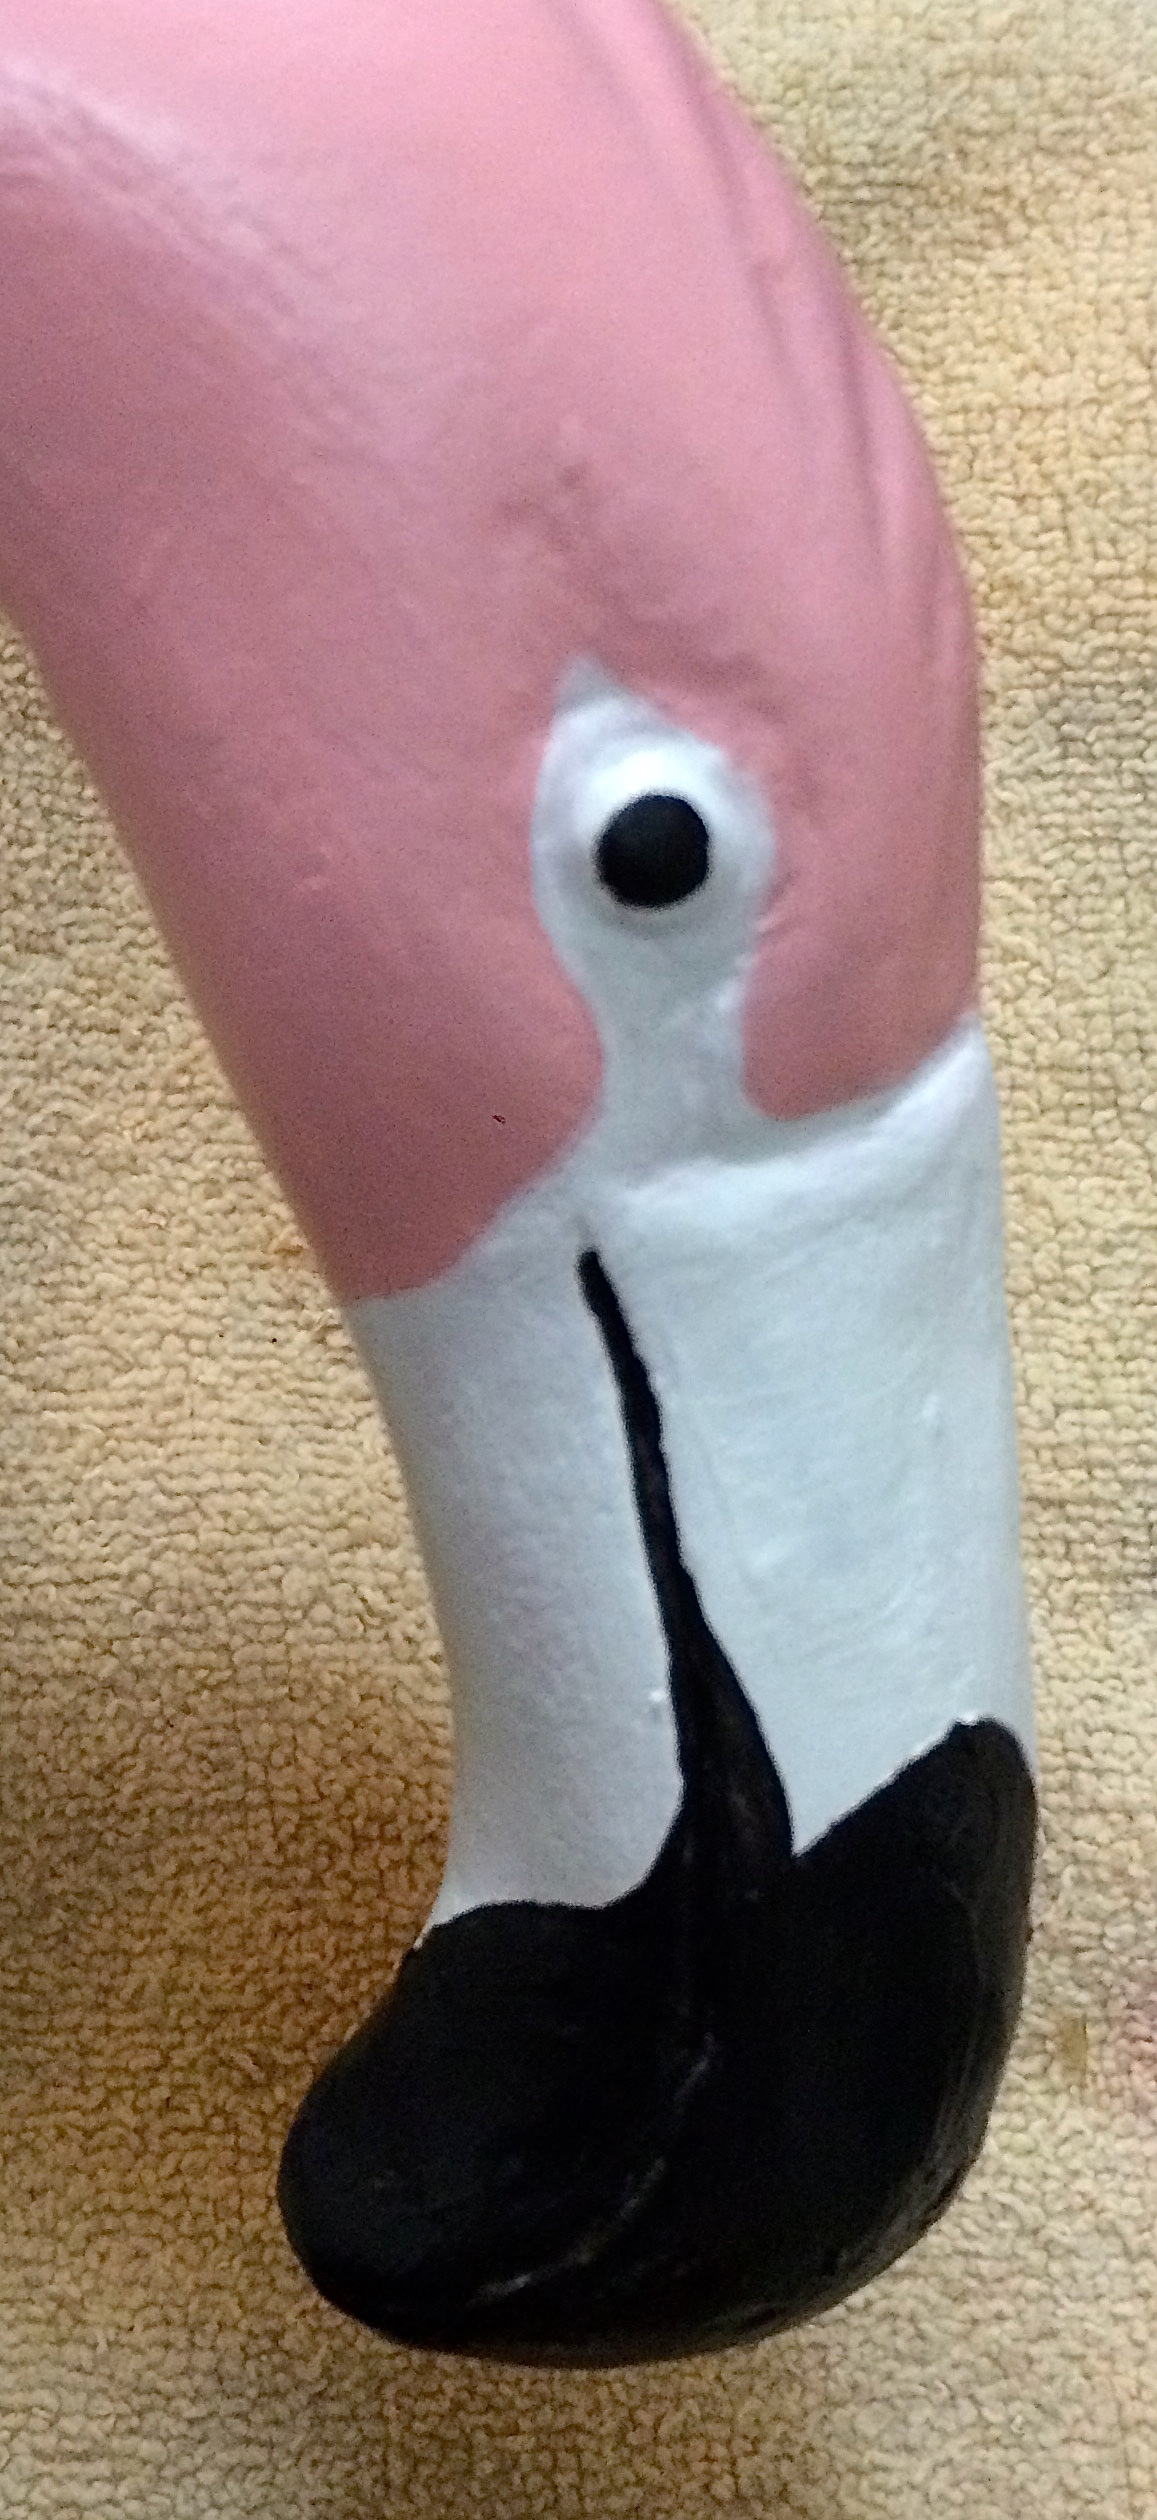
I was able to ascertain what the heads were supposed to look like.
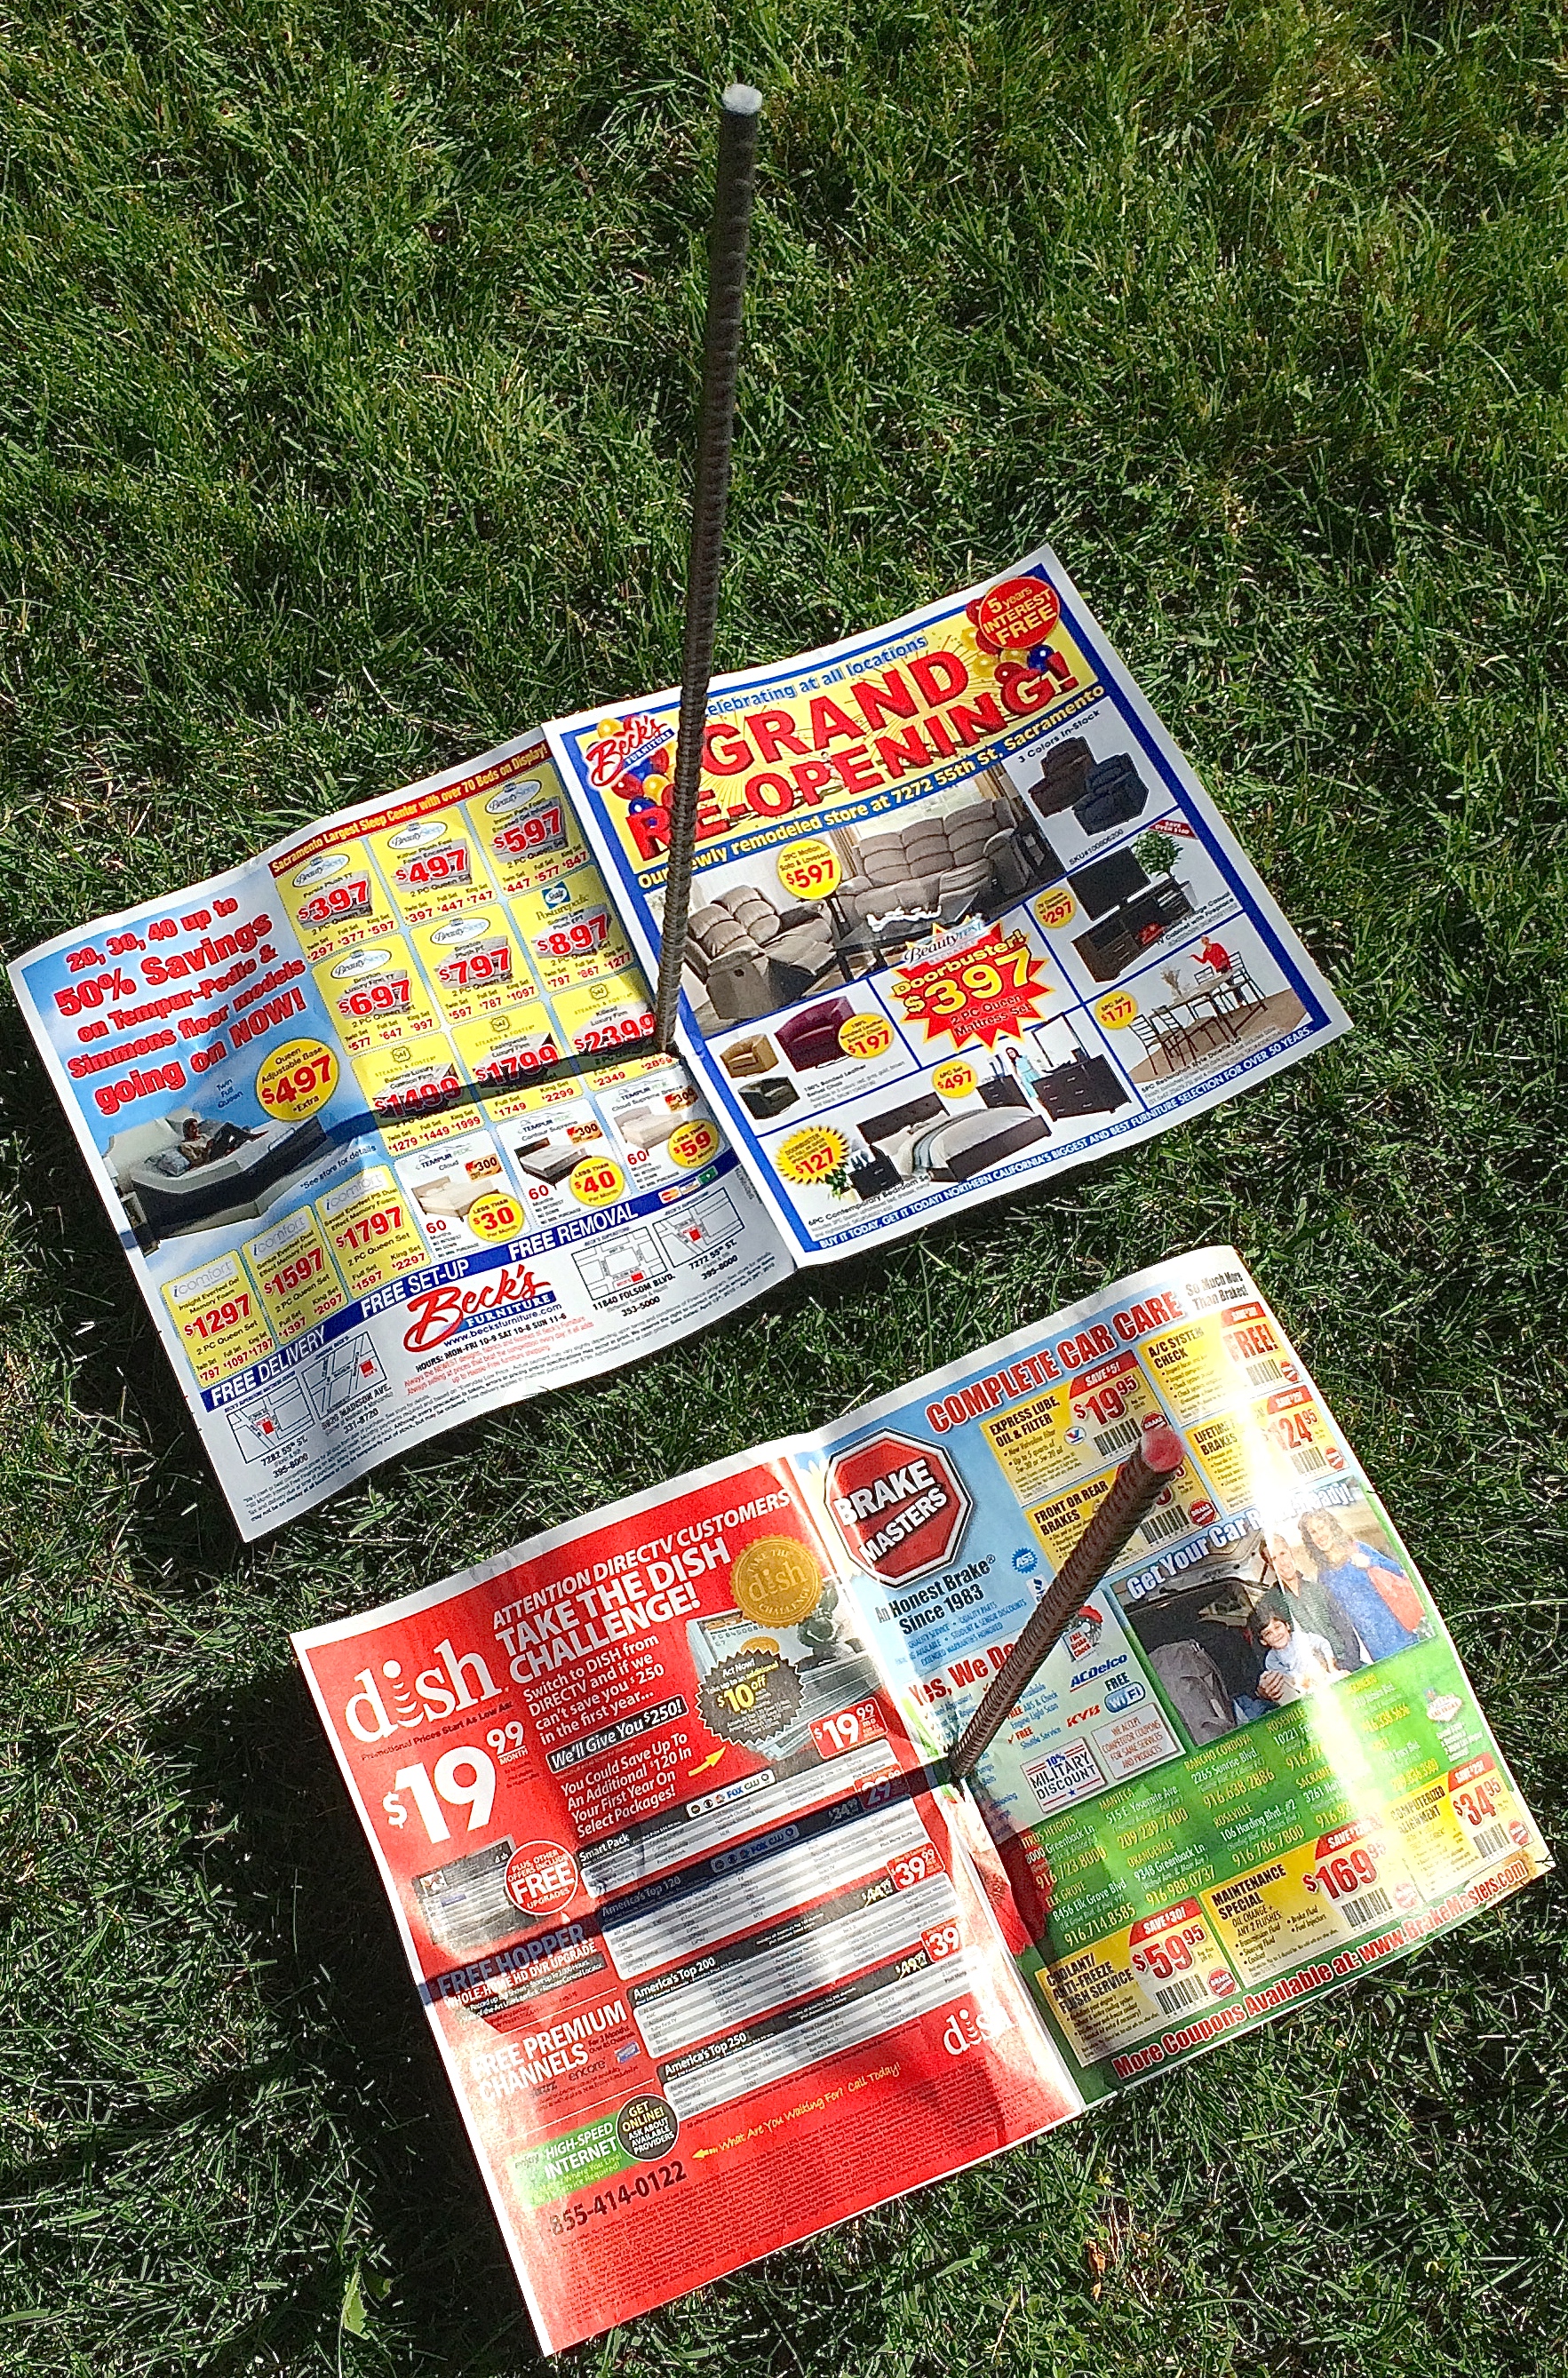
While the flamingos were inside drying I took the rebar I purchased from Home Depot and painted them a coral color. I find sticking them in the ground with newspaper at the base makes it easy to paint them and to get even coverage.
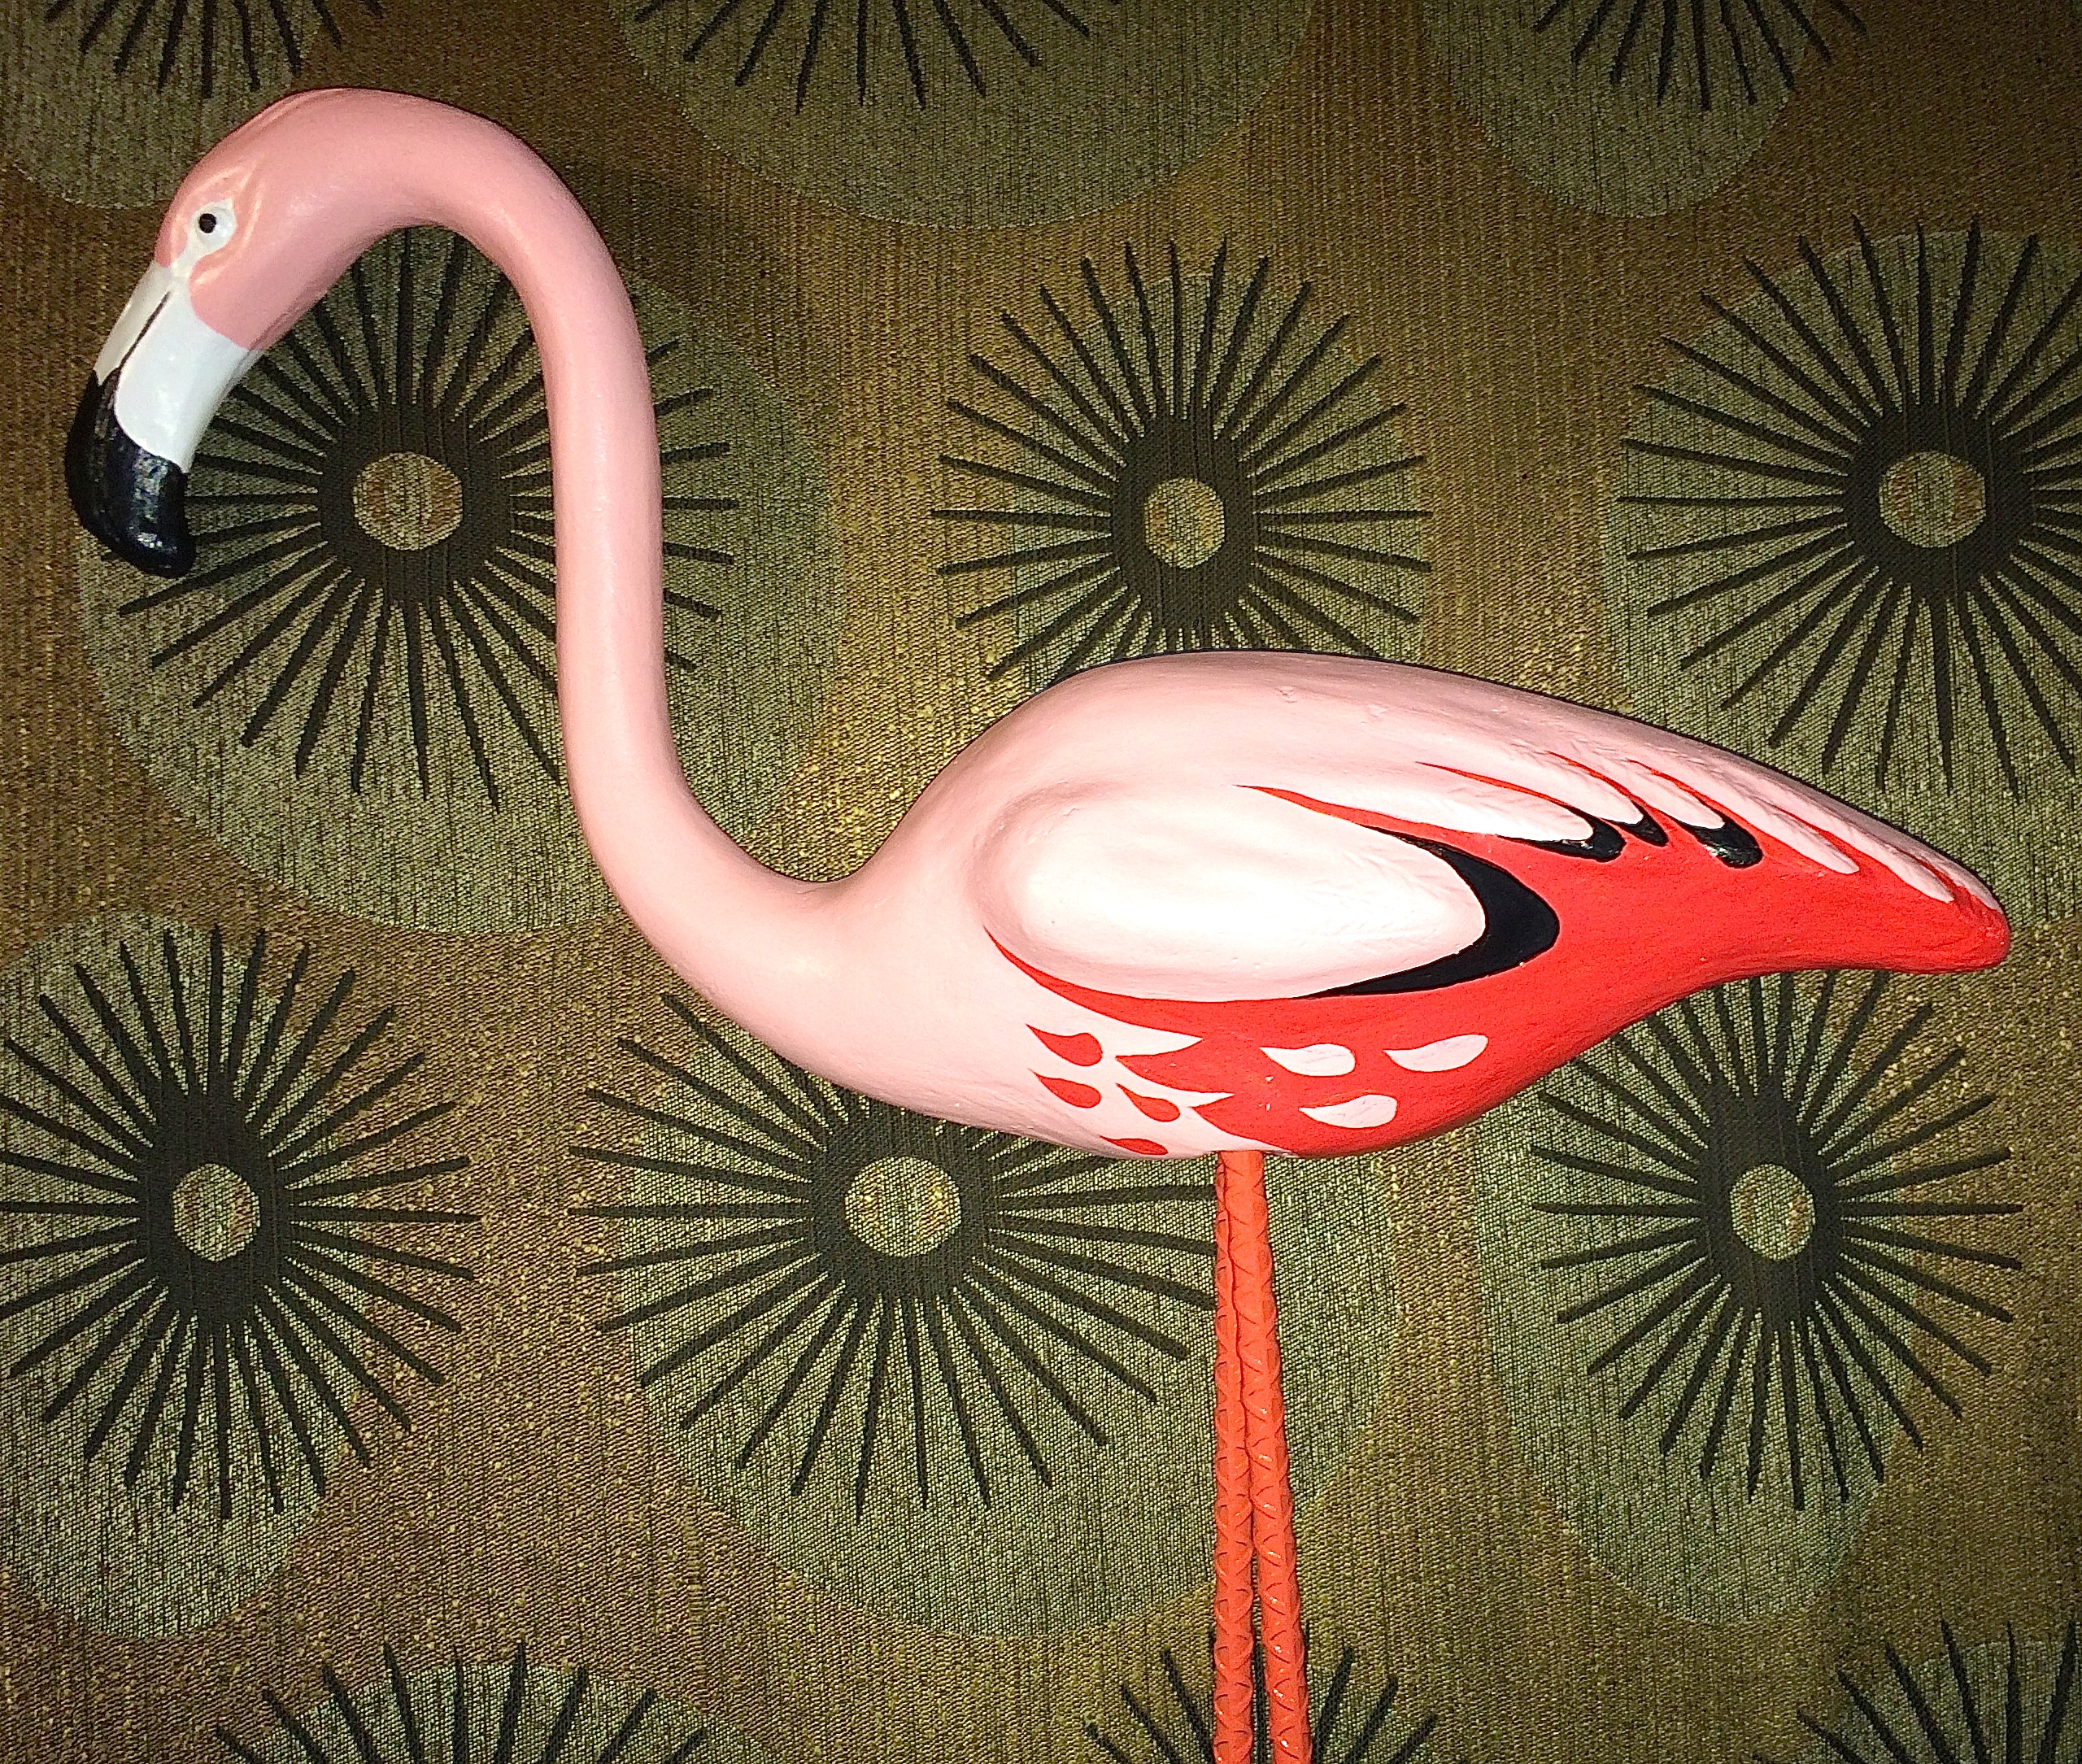
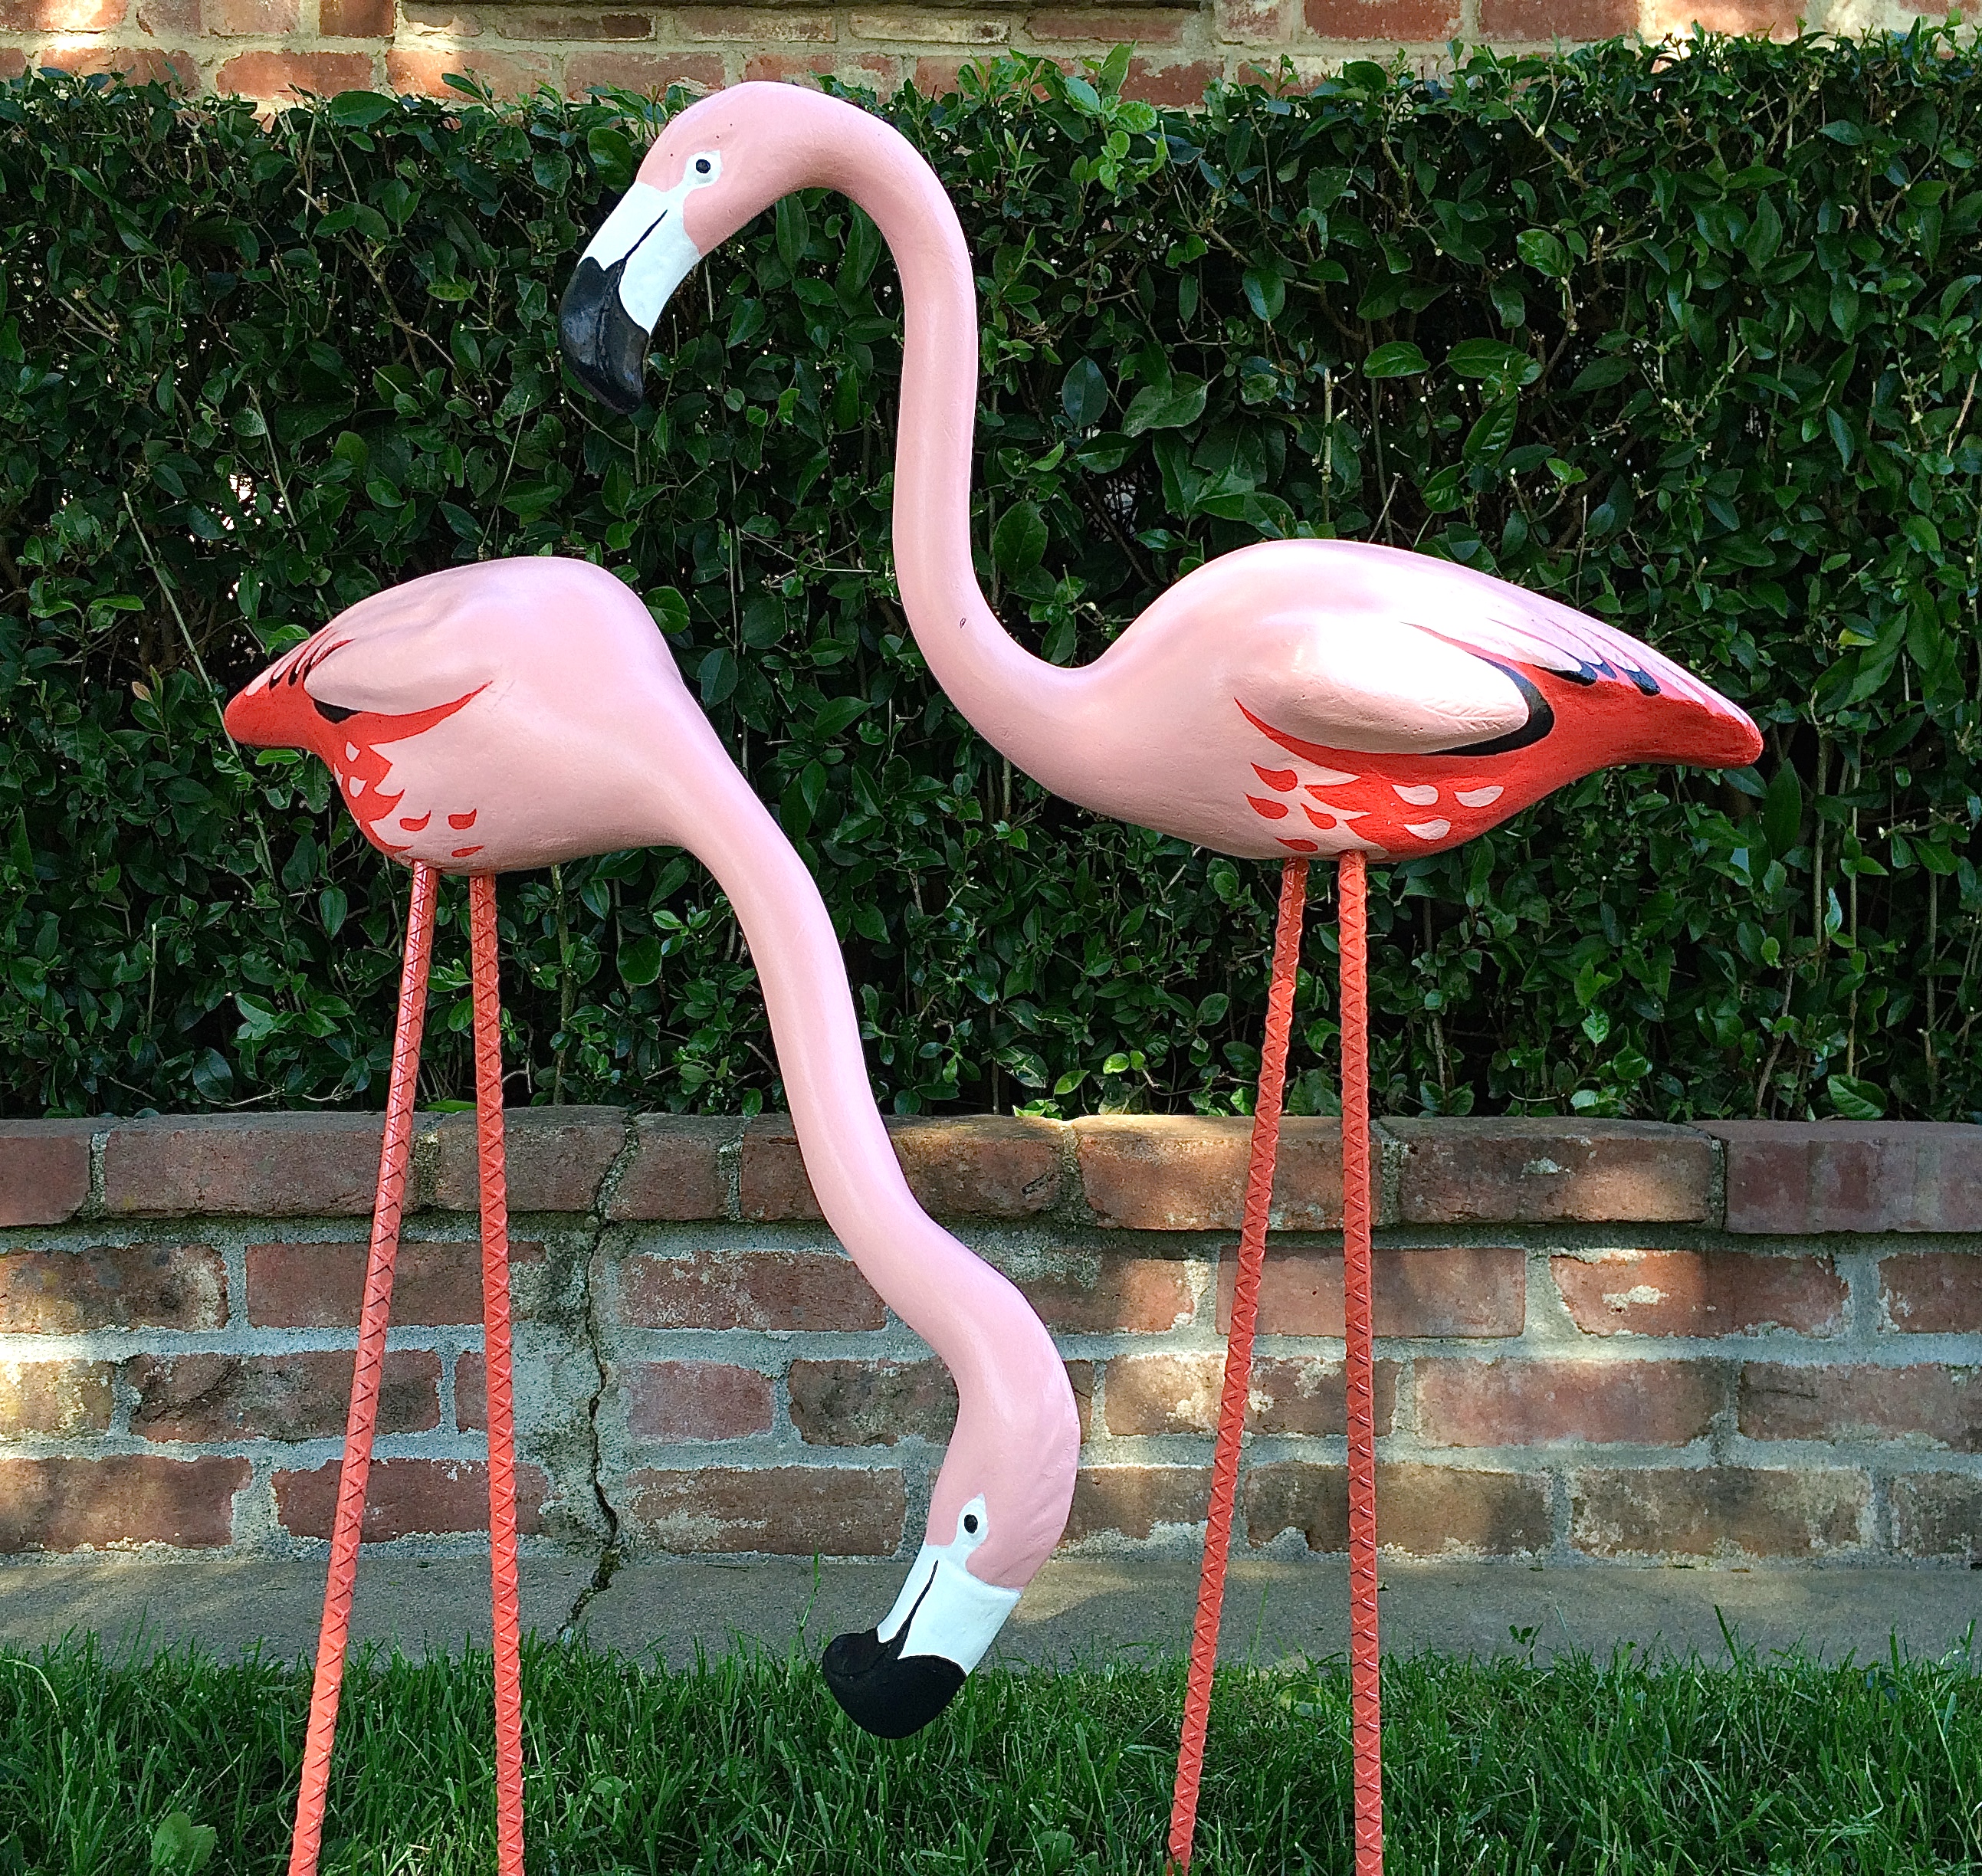
Here is how they turned out!
It took two days to knock this out.
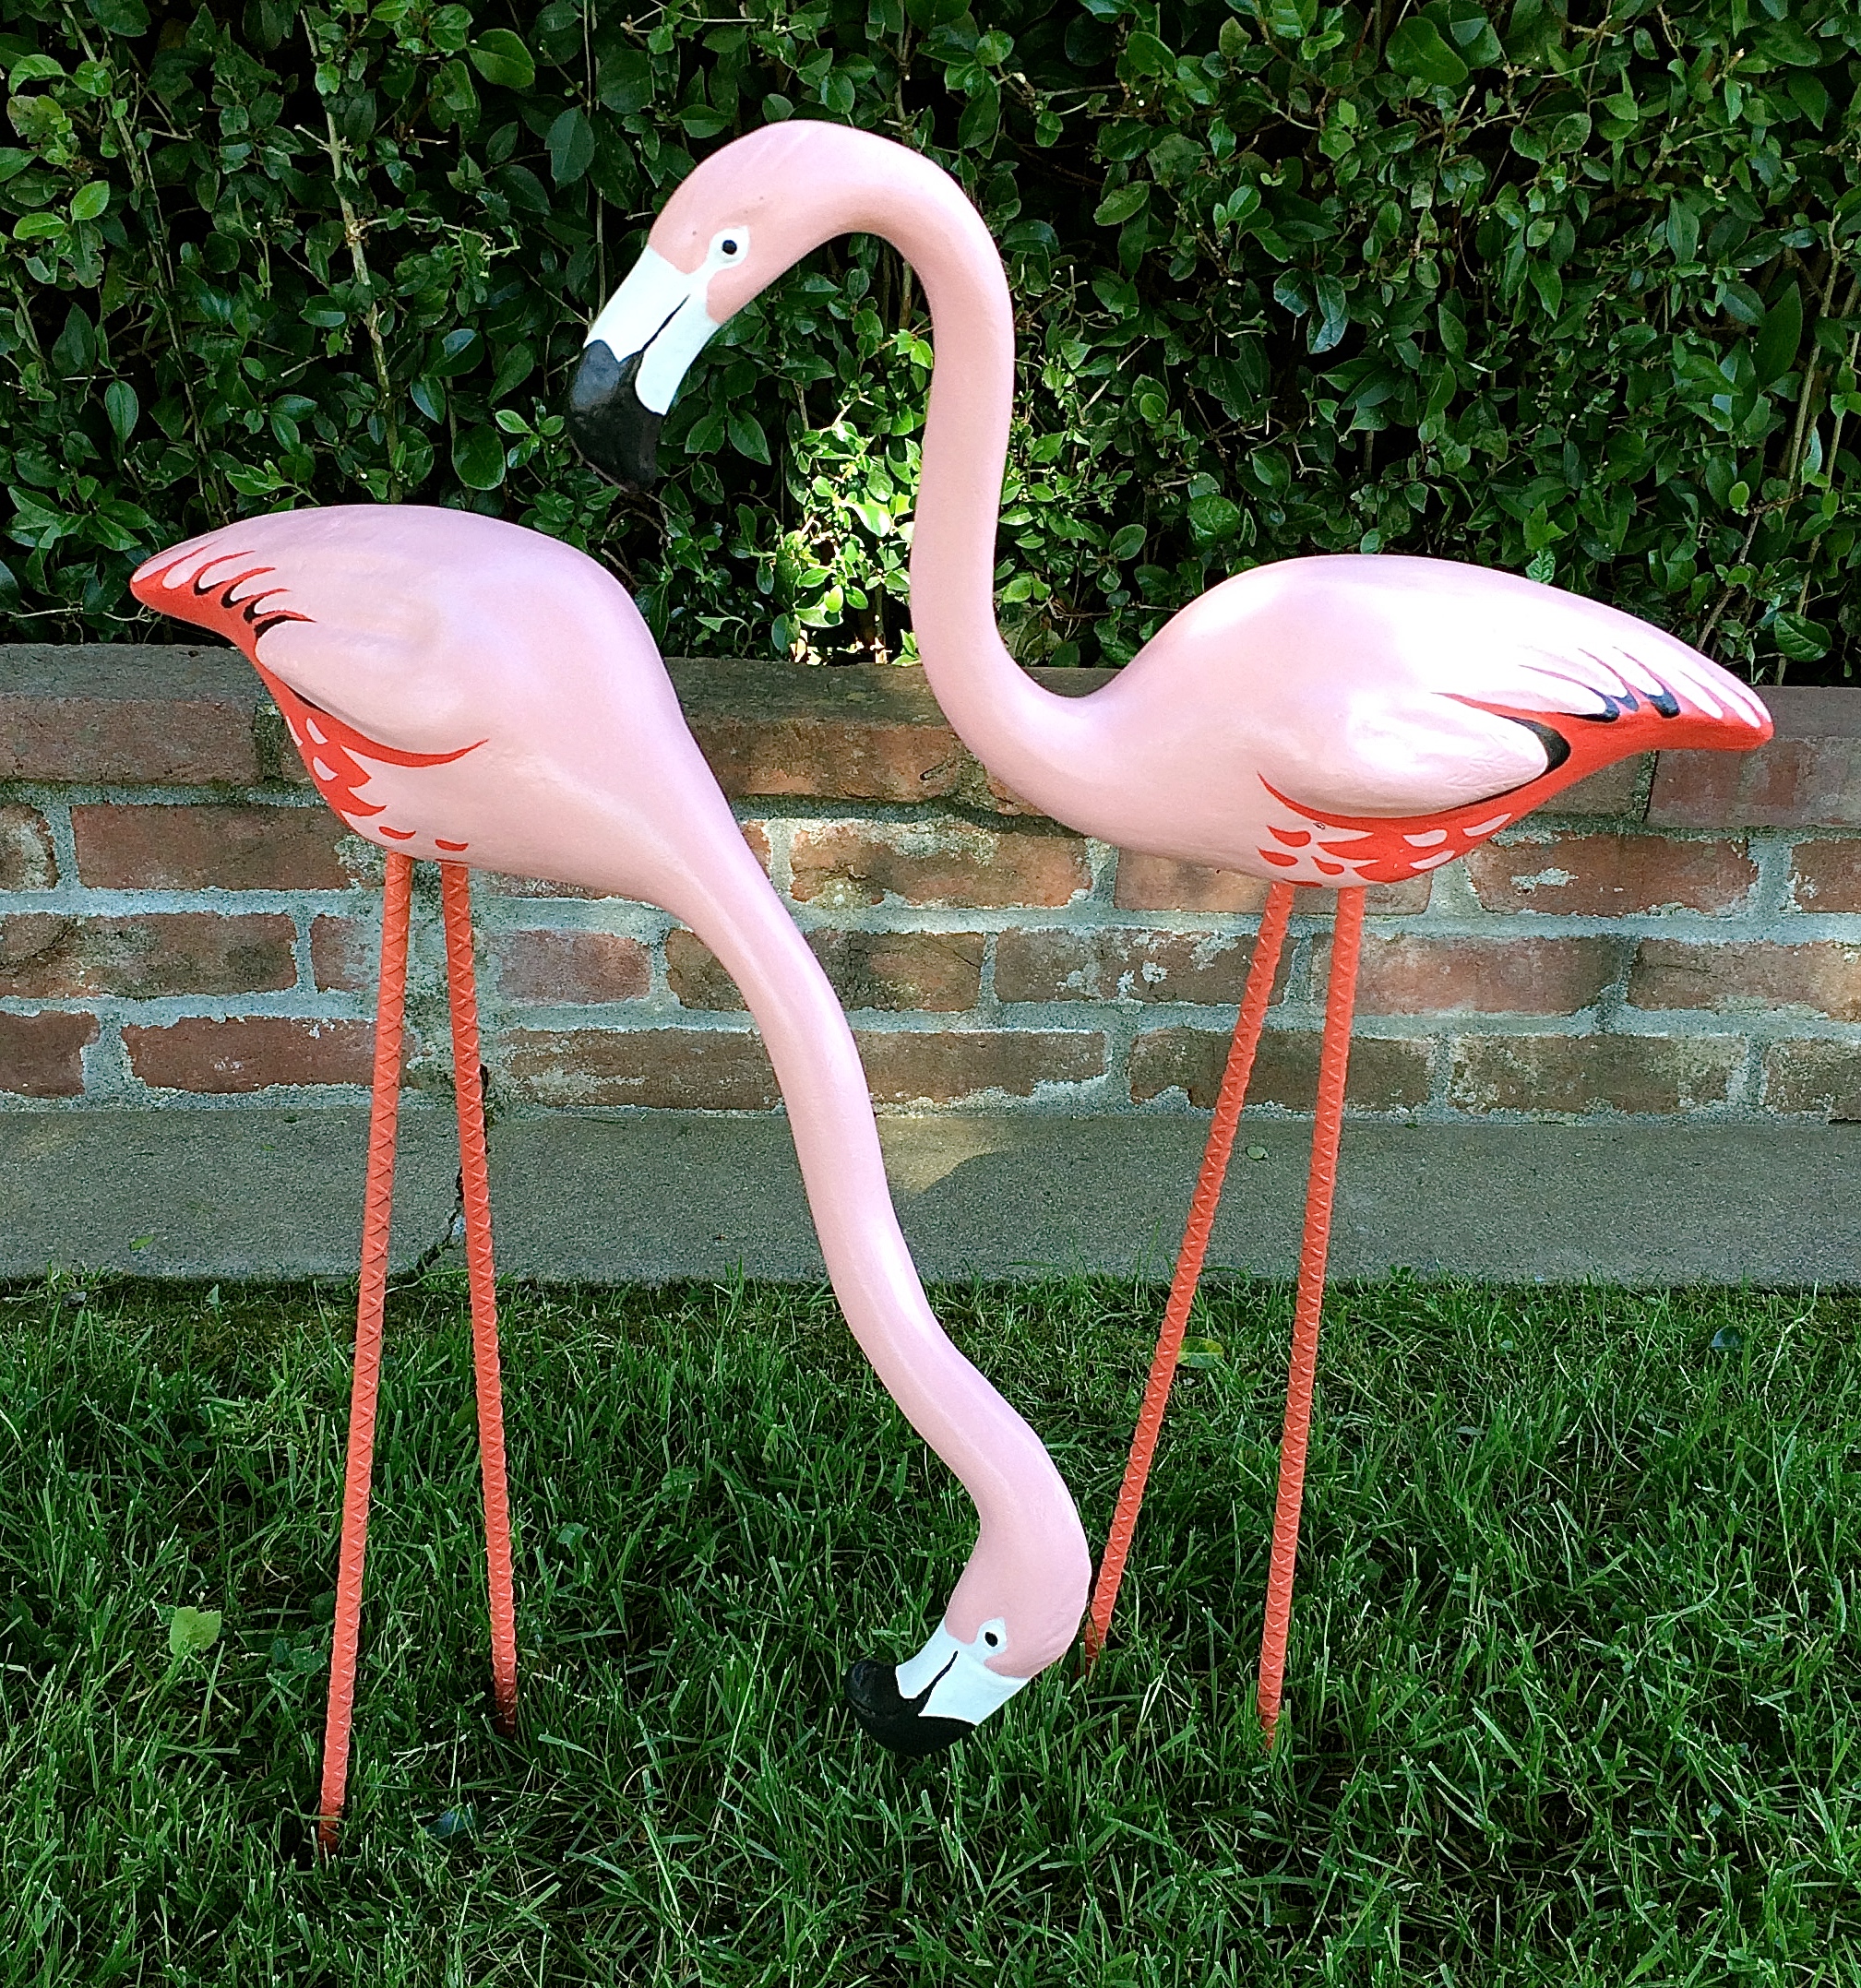
Here they are in their natural habitat surround by greenery. Unfortunately, I won’t be displaying these in our front yard because they might get snatched by someone. I plan to make a form and pour concrete around the feet so they can be displayed inside our tiki room.


I love the flamingos, Shane and Mel! Sad commentary that they might get snatched from the front yard. I had potted plants stolen from the front of our house last year (same street) 😦
Anyway, GREAT job – it’s like you’re veterinarians! 🙂
LikeLike
Thanks Zann!!!! Yeah, we wish we could display them in the front. Sorry to hear about your potted plants. Veterinarians..ha ha!!!
LikeLike
Hello Mel, Let me introduce myself. My name is Danielle. I purchased this lamp several years ago and have not been able to find a shade for it. Do you have any idea where I might find one. Cheers Danielle
LikeLike
Hi Danielle,
Can you send a picture of the lamp to shane@hepcatresto.com?
LikeLike
omg i love them!! are you suuuure they won’t be in your shop??! 😉
LikeLiked by 1 person
Ha ha! We promise to let you know first of we ever sell them.
LikeLike
I’m speechless! 😄
LikeLiked by 1 person
Those are beautiful!!!! Love!!Flamingos!!!!!🌴🌴🌴🌴🌴
LikeLiked by 1 person
Beautiful restoration job. They look great! Diana
LikeLiked by 1 person
Amazing work .. done
LikeLike
I have a pair that I am going to be restoring myself, you did a fantastic job!
But I’m wondering what kind of paint did you use? House paint? Acrylic?
LikeLike
Thanks! I used latex semi-gloss paint. I like Valspar sold at Lowe’s.
LikeLike
I’ve saved your flamingo story until I had time to restore my pair of flamingos. I hope they come out as nice as yours. Great story!
LikeLike
Thanks Janet!
LikeLike
Can you tell me how you attached the rebar to the birds? I have this exact set that I’m currently working on.
LikeLike
There are holes on the bottom of the birds that the rebar fits into.
LikeLike
I know there are holes, I have the set. Did you use a concrete stabilizer? concrete mix? HOW did you attach the rebar? Surely, the concrete birds aren’t just sitting on removable legs.
LikeLike
YES they are
LikeLike
What a nice job! I have a pair of these beauties that I found from separate sellers on ebay. One was severely damaged in shipping. You’ve inspired me to get busy with their rehab.
LikeLiked by 1 person
Great! Concrete patch is really useful when repairing these statues. Good luck!
LikeLike